Fisher and Paykel DE7027P1 User Guide - Page 10
Installation instructions
 |
View all Fisher and Paykel DE7027P1 manuals
Add to My Manuals
Save this manual to your list of manuals |
Page 10 highlights
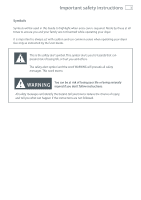
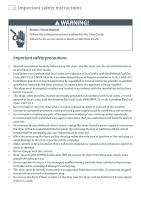
8 Installation instructions Materials: ■■ 4" (102 mm) diameter rigid metal duct (recommended). ■■ 4" (102 mm) diameter UL-listed flexible metal duct (if needed). ■■ 4" (102 mm) diameter metal elbow(s). ■■ Flexible metal gas line connector (for gas connections only). ■■ Duct or spring clamps (2). ■■ Pipe joint compound (pipe dope or tape) for gas pipe connections, resistant to LP Propane, butane and natural gas (for gas connections only). ■■ Exhaust/vent hood. ■■ Duct tape. ■■ Soap solution for gas leak detection (for gas connections only 19 mm) strain relief (electric connections only). ■■ Dryer power cord kit (power cord is not supplied with United States models). Requirement: UL-rated 120/240 V, 30 amp with 3 or 4 prongs. Identify the plug type needed from the existing house receptacle before purchasing. Length of cord must be at least 5 feet (1.5 m) long. To the installer Read these instructions completely and carefully. ■■ These instructions must be left with the home owner for future reference. ■■ Correct installation is the responsibility of the installer. ■■ Installation of this appliance must be performed by a qualified installer. ■■ The dryer must be exhausted to the outdoors. ■■ Remove the door from an old dryer before it is removed and discarded. ■■ The wiring diagram and service information can be found in the control console. ■■ The Warranty does not cover product failure as a result of improper installation. ■■ The dryer must be installed in a location where the temperature is above 50°F (10°C) to ensure suitable operation of the dryer control system. ■■ UL-listed duct material must be used. Discard existing plastic or metal foil duct and replace with UL-listed duct material. ■■ Observe all governing codes and ordinances. ■■ Follow the installation instructions carefully. Important! ■■ Save these instructions for local electrical inspector's use. ■■ Observe all governing codes and ordinances. ■■ Install the clothes dryer according to the manufacturer's instructions and local codes.
-
 1
1 -
2
-
3
-
4
-
 5
5 -
 6
6 -
 7
7 -
 8
8 -
 9
9 -
 10
10 -
 11
11 -
 12
12 -
 13
13 -
 14
14 -
 15
15 -
16
-
17
-
18
-
19
-
20
-
21
-
22
-
23
-
24
-
25
-
26
-
27
-
28
-
29
-
30
-
31
-
32
-
33
-
34
-
35
-
36
-
37
-
38
-
39
-
40
-
41
-
42
-
43
-
44
-
45
-
46
-
47
-
48
-
49
-
50
-
51
-
52
-
53
-
54
-
55
-
56
-
57
-
58
-
59
-
60
-
61
-
62
-
63
-
64
-
65
-
66
-
67
-
68
-
69
-
70
-
71
-
72
-
73
-
74
-
75
-
76
-
77
-
78
-
79
-
80
-
81
-
82
-
83
-
84
-
85
-
86
-
87
-
88
 |
 |