Fisher and Paykel DE7027P1 User Guide - Page 33
For transition venting dryer to wall, DO
 |
View all Fisher and Paykel DE7027P1 manuals
Add to My Manuals
Save this manual to your list of manuals |
Page 33 highlights
Installation instructions 31 For transition venting (dryer to wall): DO: Elbows DO cut duct as short as possible and install straight into wall Fig.20 Correct venting installation DO NOT: DO use elbows when turns are necessary DO NOT bend or collapse ducting Use elbows if turns are necessary DO NOT use excessive exhaust length Cut duct as short as possible DO NOT crush duct against the wall Fig.21 Dangerous venting installation set ups DO NOT set dryer on duct
-
 1
1 -
2
-
3
-
4
-
5
-
6
-
7
-
8
-
9
-
10
-
11
-
12
-
13
-
14
-
15
-
16
-
17
-
18
-
19
-
20
-
21
-
22
-
23
-
24
-
25
-
26
-
27
-
 28
28 -
 29
29 -
 30
30 -
 31
31 -
 32
32 -
 33
33 -
 34
34 -
 35
35 -
 36
36 -
 37
37 -
 38
38 -
39
-
40
-
41
-
42
-
43
-
44
-
45
-
46
-
47
-
48
-
49
-
50
-
51
-
52
-
53
-
54
-
55
-
56
-
57
-
58
-
59
-
60
-
61
-
62
-
63
-
64
-
65
-
66
-
67
-
68
-
69
-
70
-
71
-
72
-
73
-
74
-
75
-
76
-
77
-
78
-
79
-
80
-
81
-
82
-
83
-
84
-
85
-
86
-
87
-
88
 |
 |
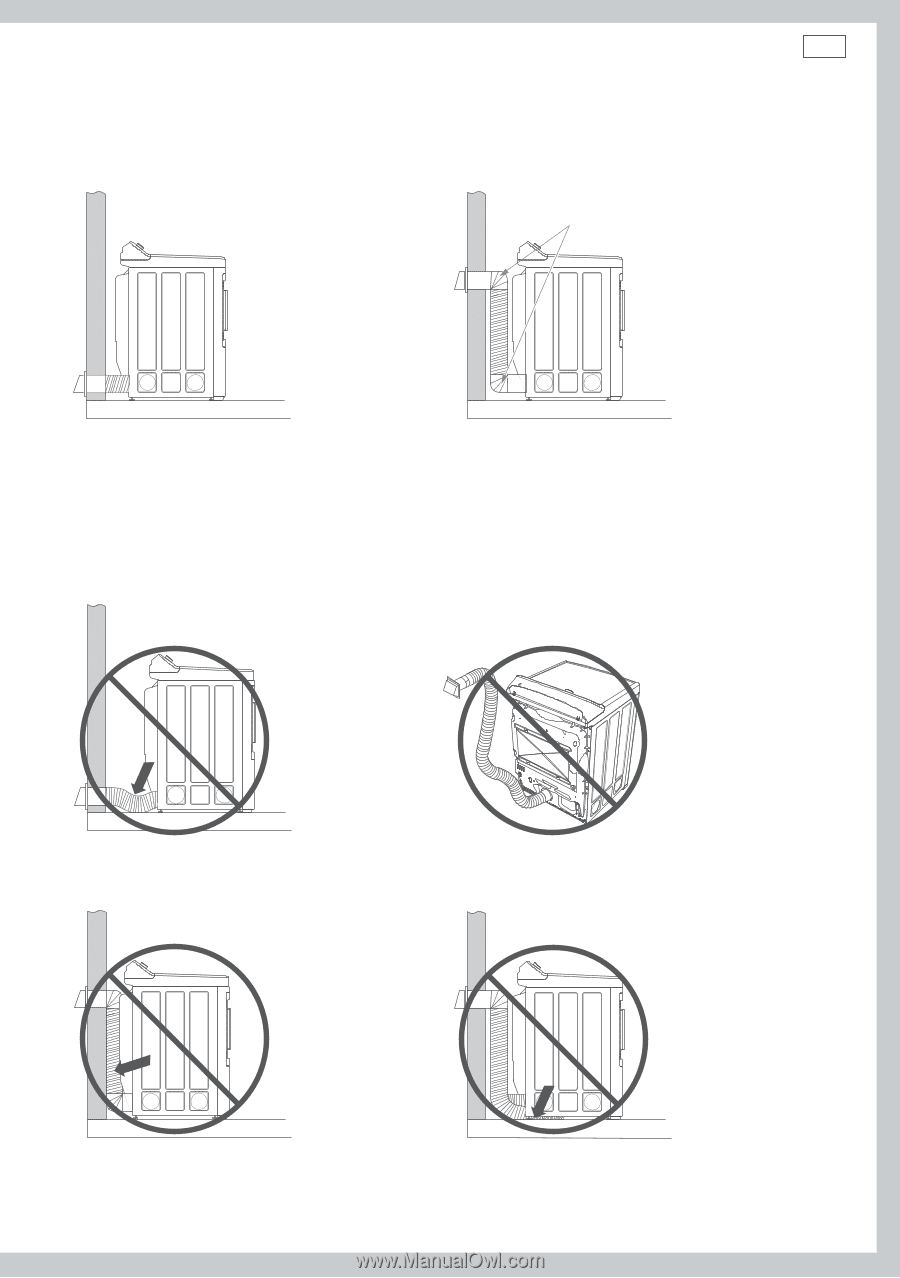
Installation instructions
31
For transition venting (dryer to wall):
DO:
DO NOT:
Fig.21 Dangerous venting installation set ups
DO NOT bend or collapse ducting
Use elbows if turns are necessary
DO NOT use excessive exhaust length
Cut duct as short as possible
DO NOT crush duct against the wall
DO NOT set dryer on duct
Fig.20 Correct venting installation
DO cut duct as short as possible
and install straight into wall
DO use elbows when turns
are necessary
Elbows