Fluke Ti200 Manual - Page 14
Battery, Two-Bay Battery Charger Base
 |
View all Fluke Ti200 manuals
Add to My Manuals
Save this manual to your list of manuals |
Page 14 highlights
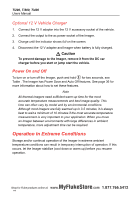
Ti200, Ti300, Ti400 Users Manual Battery Before you use the Imager for the first time, charge the battery for a minimum of two and one-half hours. The battery status shows on the five-segment charge indicator. Warning To prevent personal injury, do not put battery cells and battery packs near heat or fire. Do not put in sunlight. Note New batteries are not fully charged. Two to ten charge/discharge cycles are necessary before the battery charges to its maximum capacity. To charge the battery, use one of the options that follow: Two-Bay Battery Charger Base 1. Connect the ac power supply to the ac wall outlet and connect the dc output to the charger base. 2. Put one or two smart batteries into bays of charger base. 3. Charge batteries until charge indicators show "full." 4. Remove smart batteries and disconnect the power supply when batteries are fully charged. MyFlukeStore S8hop for Fluke products online at: www. .com 1.877.766.5412
-
 1
1 -
2
-
3
-
4
-
5
-
6
-
7
-
8
-
 9
9 -
 10
10 -
 11
11 -
 12
12 -
 13
13 -
 14
14 -
 15
15 -
 16
16 -
 17
17 -
 18
18 -
 19
19 -
20
-
21
-
22
-
23
-
24
-
25
-
26
-
27
-
28
-
29
-
30
-
31
-
32
-
33
-
34
-
35
-
36
-
37
-
38
-
39
-
40
-
41
-
42
-
43
-
44
-
45
-
46
-
47
-
48
-
49
-
50
-
51
-
52
-
53
-
54
 |
 |
