Fluke Ti200 Manual - Page 15
On-Imager AC Power Socket - specifications
 |
View all Fluke Ti200 manuals
Add to My Manuals
Save this manual to your list of manuals |
Page 15 highlights
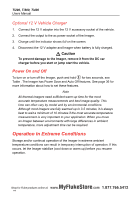
Thermal Imagers Before You Start On-Imager AC Power Socket 1. Connect the ac power adapter into an AC wall outlet and connect the dc output to the Imager's ac power socket. flashes on the display while the battery charges with the ac power adapter. 2. Charge until the charge indicator on the display does not flash. 3. Disconnect ac power adapter when the smart battery is fully charged. Note Make sure that the Imager is near room temperature before you connect it to the charger. See the charging temperature specification. Do not charge in hot or cold areas. When you charge in extreme temperatures, battery capacity may be decreased. shows in the lower left-hand corner of the display when the Imager is connected to ac power and the battery is removed. When the Imager's power is off and the ac power adapter is connected, flashes in the center of the display to show that the battery charge is in process. Keep the Imager attached to the charger until the battery condition icon shows a full charge. If you remove the Imager from the charger before a full charge shows, it may have a reduced run-time. Note When the battery is connected to ac power or the unit is in video mode, the Sleep Mode/Auto Off feature is disabled automatically. MyFlukeStore Shop for Fluke products online at: www. .com 1.877.766.54192
-
 1
1 -
2
-
3
-
4
-
5
-
6
-
7
-
8
-
9
-
 10
10 -
 11
11 -
 12
12 -
 13
13 -
 14
14 -
 15
15 -
 16
16 -
 17
17 -
 18
18 -
 19
19 -
 20
20 -
21
-
22
-
23
-
24
-
25
-
26
-
27
-
28
-
29
-
30
-
31
-
32
-
33
-
34
-
35
-
36
-
37
-
38
-
39
-
40
-
41
-
42
-
43
-
44
-
45
-
46
-
47
-
48
-
49
-
50
-
51
-
52
-
53
-
54
 |
 |
