Fluke Ti200 Manual - Page 38
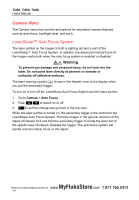
Camera Menu, LaserSharp™ Auto Focus System, LaserSharp, Auto Focus System
 |
View all Fluke Ti200 manuals
Add to My Manuals
Save this manual to your list of manuals |
Page 38 highlights
Ti200, Ti300, Ti400 Users Manual Camera Menu The Camera menu has controls and options for secondary camera features such as auto focus, backlight level, and torch. LaserSharp™ Auto Focus System The laser pointer on the Imager is both a sighting aid and a part of the LaserSharp™ Auto Focus System. In addition, the advanced manual focus of the Imager works both when the auto focus system is enabled or disabled. Warning To prevent eye damage and personal injury, do not look into the laser. Do not point laser directly at persons or animals or indirectly off reflective surfaces. The laser warning symbol () shows in the Header zone of the display when you pull the secondary trigger. To turn on or turn off the LaserSharp Auto Focus System and the laser pointer: 1. Go to Camera > Auto Focus. 2. Push / to select on or off. 3. to set the change and go back to the live view. When the laser pointer is turned on, the secondary trigger is the control for the LaserSharp Auto Focus System. Point the Imager in the general direction of the object of interest. Pull and hold the secondary trigger to locate the laser dot on the specific area of interest. Release the trigger. The auto focus system will quickly and accurately focus on the object. MyFlukeStore S3ho2p for Fluke products online at: www. .com 1.877.766.5412
-
 1
1 -
2
-
3
-
4
-
5
-
6
-
7
-
8
-
9
-
10
-
11
-
12
-
13
-
14
-
15
-
16
-
17
-
18
-
19
-
20
-
21
-
22
-
23
-
24
-
25
-
26
-
27
-
28
-
29
-
30
-
31
-
32
-
 33
33 -
 34
34 -
 35
35 -
 36
36 -
 37
37 -
 38
38 -
 39
39 -
 40
40 -
 41
41 -
 42
42 -
 43
43 -
44
-
45
-
46
-
47
-
48
-
49
-
50
-
51
-
52
-
53
-
54
 |
 |
