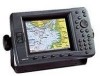
Garmin GPSMAP 2206 GPSMAP 2206/2210 Owner's Manual - Page 31
Man OverBoard (MOB), Creating and Using Routes, Creating a New Route
 |
UPC - 753759053024
View all Garmin GPSMAP 2206 manuals
Add to My Manuals
Save this manual to your list of manuals |
Page 31 highlights
Man OverBoard (MOB) Use the Man OverBoard function to simultaneously mark and set a course to a location for quick response to emergency situations. To initiate the MOB function: 1. Press and hold the NAV/MOB key. 2. Press the Yes soft key to confirm and begin navigating to the MOB location. When a MOB is initiated, a MOB waypoint with an international MOB symbol ( ) is created, and the unit is on an active navigation to that point. Use any of the navigation pages to guide you back to the MOB point. The MOB waypoint is stored in the waypoint list, and you can delete or edit it like any other waypoint. MOB point BASIC OPERATION > MAN OVERBOARD (MOB) AND CREATING AND USING ROUTES Creating and Using Routes You can create and store up to 50 reversible routes (numbered 1-50), with up to 300 points each. Creating a New Route Using the Route tab on the Main Menu, you can create a new route in one of two ways. You can select waypoints or map items on the map window, allowing you to see each route point on the screen as you create the route, or you can select waypoints from the waypoint list, allowing you to see a list of the route points as you create the route. To create a new route using the map window: 1. Press and hold ADJ/MENU to open the Main Menu. 2. Use the ROCKER to highlight the Routes tab. 3. Press the New Route soft key. The Route map window appears, and the position marker ( ) changes to the map pointer ( ) with "ADD" underneath it. 4. Use the ROCKER to highlight the location you want to add to your route, and press ENTER. As you add each new waypoint to the route, the upper-left corner of the screen shows the waypoint name. The bottom of the screen shows you the number of available points. Repeat this step until you finish defining all route waypoints. NOTE: If you select an area of the map that is not a feature or waypoint, a new waypoint is created for that location. To stop navigation to the MOB location: 1. Press NAV/MOB to open the Navigation menu. 2. Highlight Stop Navigation, and press ENTER. GPSMAP 2206/2210 Owner's Manual 23
-
 1
1 -
2
-
3
-
4
-
5
-
6
-
7
-
8
-
9
-
10
-
11
-
12
-
13
-
14
-
15
-
16
-
17
-
18
-
19
-
20
-
21
-
22
-
23
-
24
-
25
-
 26
26 -
 27
27 -
 28
28 -
 29
29 -
 30
30 -
 31
31 -
 32
32 -
 33
33 -
 34
34 -
 35
35 -
 36
36 -
37
-
38
-
39
-
40
-
41
-
42
-
43
-
44
-
45
-
46
-
47
-
48
-
49
-
50
-
51
-
52
-
53
-
54
-
55
-
56
-
57
-
58
-
59
-
60
-
61
-
62
-
63
-
64
-
65
-
66
-
67
-
68
-
69
-
70
-
71
-
72
-
73
-
74
-
75
-
76
-
77
-
78
-
79
-
80
-
81
-
82
-
83
-
84
-
85
-
86
-
87
-
88
-
89
-
90
-
91
-
92
-
93
-
94
-
95
-
96
-
97
-
98
-
99
-
100
-
101
-
102
-
103
-
104
-
105
-
106
 |
 |
