Garmin dezl OTR810 Owners Manual - Page 82
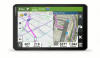
Connecting a Wired Backup Camera, Viewing the Backup Camera, Switching Cameras
 |
View all Garmin dezl OTR810 manuals
Add to My Manuals
Save this manual to your list of manuals |
Page 82 highlights
Connecting a Wired Backup Camera To connect a wired backup camera, you must use an optional video mount accessory, which includes a 3.5 mm composite video input jack. Go to garmin.com to purchase an accessory mount. The video mount accessory is included with some device models. You can connect a wired backup camera and view the output on the device screen. 1 Replace the original device mount with the video mount accessory. 2 Plug the camera video cable into the video input jack on the mount. Viewing the Backup Camera WARNING This device is intended to enhance your situational awareness when used properly. If used improperly, you could become distracted by the display, which could lead to an accident causing serious personal injury or death. Only access the information displayed on the device with a glance. Always maintain awareness of your surroundings and do not stare at the display or become distracted by the display. Focusing on the display could prevent you from avoiding obstacles or hazards. After you pair your camera with a compatible Garmin navigation device, the camera view appears automatically when you turn on your navigation device, and you can manually show the camera at any time. • If your navigation device is connected to an ignition-switched power outlet (recommended), turn on your vehicle. • If your navigation device is connected to an always-on power outlet, turn on the navigation device. • To show the camera manually, select . • To show or hide the camera using voice commands, say Show Video or Hide Video. NOTE: Voice commands are not available on all navigation devices. The voice commands may vary based on your navigation device model. This feature is not available for all languages or may require additional navigation device setup for some languages. For more information, see the OK, Garmin app on your navigation device, or the navigation device owner's manual. The camera view appears. When the camera detects the vehicle is moving forward, the camera automatically stops sending video, and the navigation device returns to normal operation. The camera video is dismissed automatically after 2 minutes and 30 seconds, whether or not your vehicle has moved forward. Switching Cameras When multiple backup cameras are transmitting to your device, you can switch between the views from the cameras. 1 Select > Tools > Cameras. 2 Select a camera from the bottom of the screen. The video feed from the camera appears. 76 Appendix
-
 1
1 -
2
-
3
-
4
-
5
-
6
-
7
-
8
-
9
-
10
-
11
-
12
-
13
-
14
-
15
-
16
-
17
-
18
-
19
-
20
-
21
-
22
-
23
-
24
-
25
-
26
-
27
-
28
-
29
-
30
-
31
-
32
-
33
-
34
-
35
-
36
-
37
-
38
-
39
-
40
-
41
-
42
-
43
-
44
-
45
-
46
-
47
-
48
-
49
-
50
-
51
-
52
-
53
-
54
-
55
-
56
-
57
-
58
-
59
-
60
-
61
-
62
-
63
-
64
-
65
-
66
-
67
-
68
-
69
-
70
-
71
-
72
-
73
-
74
-
75
-
76
-
 77
77 -
 78
78 -
 79
79 -
 80
80 -
 81
81 -
 82
82 -
 83
83 -
 84
84 -
 85
85 -
 86
86
 |
 |
