HTC Touch Diamond Verizon User Manual - Page 105
Date & Time, Touch and Press
 |
View all HTC Touch Diamond Verizon manuals
Add to My Manuals
Save this manual to your list of manuals |
Page 105 highlights
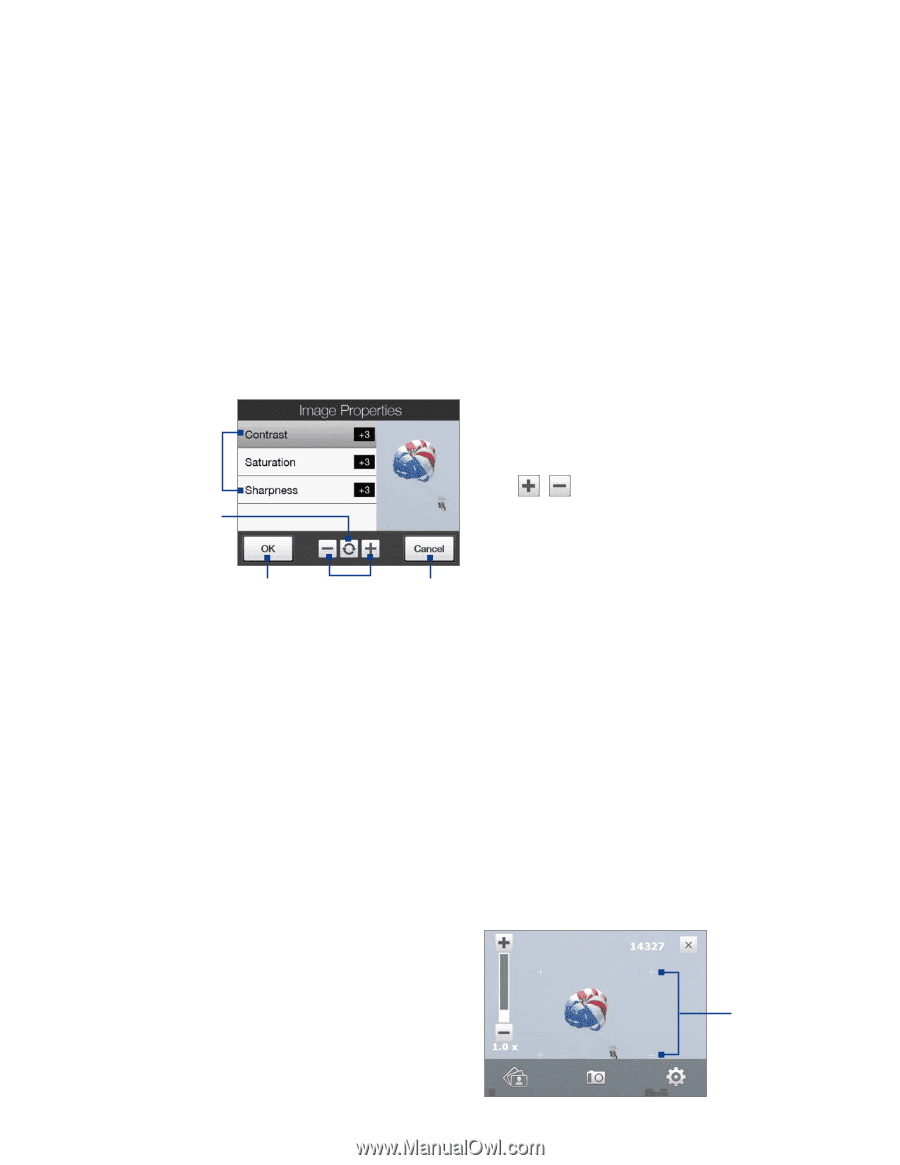
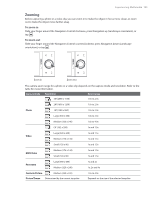
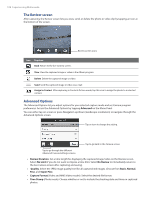
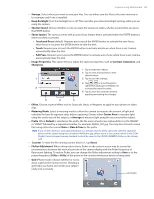
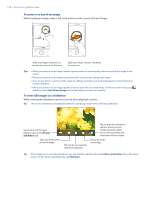
Experiencing Multimedia 105 • Storage. Select where you want to save your files. You can either save the files to the main memory or to a storage card if one is installed. • Keep Backlight. Turn the backlight on or off. This overrides your device backlight settings while you are using the camera. • Shutter Sound. Choose whether or not you want the camera to make a shutter sound when you press the ENTER button. • Shoot Option. The camera comes with an auto-focus feature that is activated when the ENTER button is either touched or pressed. • Touch and Press (default). Requires you to touch the ENTER button to activate the auto-focus; when focus is set, press the ENTER button to take the shot. • Touch. Requires you to touch the ENTER button to activate autofocus; when focus is set, Camera automatically takes the shot. • Full Press. Requires you to press the ENTER button to activate auto-focus; when focus is set, Camera automatically takes the shot. • Image Properties. This option lets you adjust the capture properties, such as Contrast, Saturation, and Sharpness. 1 Tap a property to adjust. 2 Tap to reset all properties to their default values. 1 3 Tap to save the settings. 4 Tap / or press Navigation right/left (Landscape orientation) to 2 increase/decrease the value. 5 Tap to close the submenu without applying and saving the changes. 3 4 5 • Effect. Choose a special effect such as Grayscale, Sepia, or Negative, to apply to your photos or video clips. • Metering Mode. Select a metering mode to allow the camera to measure the amount of light and calculate the best-fit exposure value before capturing. Choose either Center Area to measure light using the center area of the subject, or Average to measure light using the area around the subject. • Prefix. When Default is selected as the prefix, the file name of each new captured file is set to "IMAGE" or "VIDEO" followed by a sequential number, for example: IMAGE_001.jpg. You may also choose to name files using either the current Date or Date & Time as the prefix. Note If you set the Camera to save captured photos to a storage card, the prefix cannot be selected. Captured photos will be named using the convention IMAGnnnn.jpg (where 'nnnn' is the counter) which is the DCIM (Digital Camera Images) naming standard, and will be saved to the \DCIM\100MEDIA folder on the storage card. • Counter. To reset the file naming counter back to 1, tap Reset. • Flicker Adjustment. When taking indoor shots, flicker on the camera screen may be caused by inconsistencies between the vertical scan rate of the camera display and the flicker frequency of fluorescent lighting. To reduce flicker, you can change the flicker adjustment setting to Auto or to the proper frequency (50Hz or 60Hz) of the power in the country where your device is being used. • Grid (Photo mode). Choose whether or not to show a grid on the Camera screen. Showing a grid helps you frame and center your subject easily and accurately. Grid marks .
-
 1
1 -
2
-
3
-
4
-
5
-
6
-
7
-
8
-
9
-
10
-
11
-
12
-
13
-
14
-
15
-
16
-
17
-
18
-
19
-
20
-
21
-
22
-
23
-
24
-
25
-
26
-
27
-
28
-
29
-
30
-
31
-
32
-
33
-
34
-
35
-
36
-
37
-
38
-
39
-
40
-
41
-
42
-
43
-
44
-
45
-
46
-
47
-
48
-
49
-
50
-
51
-
52
-
53
-
54
-
55
-
56
-
57
-
58
-
59
-
60
-
61
-
62
-
63
-
64
-
65
-
66
-
67
-
68
-
69
-
70
-
71
-
72
-
73
-
74
-
75
-
76
-
77
-
78
-
79
-
80
-
81
-
82
-
83
-
84
-
85
-
86
-
87
-
88
-
89
-
90
-
91
-
92
-
93
-
94
-
95
-
96
-
97
-
98
-
99
-
 100
100 -
 101
101 -
 102
102 -
 103
103 -
 104
104 -
 105
105 -
 106
106 -
 107
107 -
 108
108 -
 109
109 -
 110
110 -
111
-
112
-
113
-
114
-
115
-
116
-
117
-
118
-
119
-
120
-
121
-
122
-
123
-
124
-
125
-
126
-
127
-
128
-
129
-
130
-
131
-
132
-
133
-
134
-
135
-
136
-
137
-
138
-
139
-
140
-
141
-
142
-
143
-
144
-
145
-
146
-
147
-
148
-
149
-
150
-
151
-
152
-
153
-
154
-
155
-
156
 |
 |