HP 7410 Wired/Wireless Networking Guide - Page 31
For Macintosh, View Network Settings, Network Menu, Display Summary - installation software
 |
UPC - 829160502724
View all HP 7410 manuals
Add to My Manuals
Save this manual to your list of manuals |
Page 31 highlights
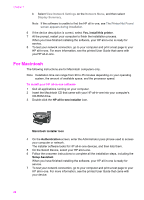
Chapter 7 b Select View Network Settings on the Network Menu, and then select Display Summary. Note If the software is unable to find the HP all-in-one, see The Printer Not Found screen appears during installation. 6 If the device description is correct, select Yes, install this printer. 7 At the prompt, restart your computer to finish the installation process. When you have finished installing the software, your HP all-in-one is ready for service. 8 To test your network connection, go to your computer and print a test page to your HP all-in-one. For more information, see the printed User Guide that came with yourHP all-in-one. For Macintosh The following instructions are for Macintosh computers only. Note Installation time can range from 20 to 45 minutes depending on your operating system, the amount of available space, and the processor speed. To install your HP all-in-one software 1 Quit all applications running on your computer. 2 Insert the Macintosh CD that came with your HP all-in-one into your computer's CD-ROM drive. 3 Double-click the HP all-in-one installer icon. Macintosh installer icon 4 On the Authentication screen, enter the Administrator pass phrase used to access your computer or network. The installer software looks for HP all-in-one devices, and then lists them. 5 On the Select Device, select your HP all-in-one. 6 Follow the onscreen instructions to complete all the installation steps, including the Setup Assistant. When you have finished installing the software, your HP all-in-one is ready for service. 7 To test your network connection, go to your computer and print a test page to your HP all-in-one. For more information, see the printed User Guide that came with your device. 28
-
 1
1 -
2
-
3
-
4
-
5
-
6
-
7
-
8
-
9
-
10
-
11
-
12
-
13
-
14
-
15
-
16
-
17
-
18
-
19
-
20
-
21
-
22
-
23
-
24
-
25
-
 26
26 -
 27
27 -
 28
28 -
 29
29 -
 30
30 -
 31
31 -
 32
32 -
 33
33 -
 34
34 -
 35
35 -
 36
36 -
37
-
38
-
39
-
40
-
41
-
42
-
43
-
44
-
45
-
46
-
47
-
48
-
49
-
50
-
51
-
52
-
53
-
54
-
55
-
56
-
57
-
58
-
59
-
60
-
61
-
62
 |
 |
