HP 7410 Wired/Wireless Networking Guide - Page 42
Solution, Cause, To use the control panel, Setup, To use the Embedded Web Server, Address, Networking
 |
UPC - 829160502724
View all HP 7410 manuals
Add to My Manuals
Save this manual to your list of manuals |
Page 42 highlights
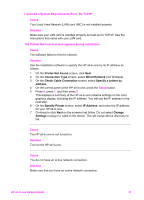
Solution Add encryption security to your network. For information, see Add security to the network. Cause Your SSID or WEP key might be set incorrectly. Solution You can use either the Embedded Web Server or the control panel to change the SSID or WEP. To use the control panel 1 On the control panel of the HP all-in-one, press the Setup button. 2 Press 8, and then press 4. This displays the Network menu and then selects Wireless Setup Wizard. 3 Press to highlight your network, and then press OK. 4 When prompted, use the visual keyboard to enter the new Network Name and WEP key. 5 Complete the Wireless Setup Wizard. To use the Embedded Web Server 1 With an Ethernet cable attached, print a network configuration page. For information, see Print and view a network configuration page. 2 Make sure the network SSID and WEP key shown on the configuration page match those used on your wireless network. 3 If one or both are incorrect, enter either the URL or device IP address from the configuration page into the Address box on your Web browser. For example, http://195.168.0.5. The HP all-in-one Embedded Web Server Home page appears. 4 Click the Networking tab. 5 In the Connections navigation menu, click Wireless. 6 Click Start Wizard. 7 Enter the correct values in the appropriate sections (Network Name and Encryption). 8 Click Apply. Cause You are using an authentication protocol not supported by the installation software. Solution Use one of the supported protocol types listed in the Embedded Web Server. Types not supported include: WPA2-AES, WPA2-TKIP, LEAP, PEAP, EAP-MD5, EAP-TLS, or EAP-TTLS. HP all-in-one Network Guide 39
-
 1
1 -
2
-
3
-
4
-
5
-
6
-
7
-
8
-
9
-
10
-
11
-
12
-
13
-
14
-
15
-
16
-
17
-
18
-
19
-
20
-
21
-
22
-
23
-
24
-
25
-
26
-
27
-
28
-
29
-
30
-
31
-
32
-
33
-
34
-
35
-
36
-
 37
37 -
 38
38 -
 39
39 -
 40
40 -
 41
41 -
 42
42 -
 43
43 -
 44
44 -
 45
45 -
 46
46 -
 47
47 -
48
-
49
-
50
-
51
-
52
-
53
-
54
-
55
-
56
-
57
-
58
-
59
-
60
-
61
-
62
 |
 |
