HP 9000 Superdome SX2000 HP Installation Guide, HP Integrity Superdome/sx2000 - Page 24
Attaching the Blower Side Bezels, Attaching the Front Side Skins
 |
View all HP 9000 Superdome SX2000 manuals
Add to My Manuals
Save this manual to your list of manuals |
Page 24 highlights
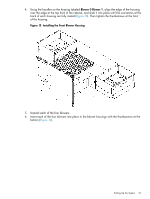
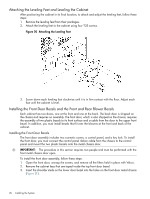
Figure 18 Attaching the Front Side Skins 4. Push the side skins together, making sure the skins overlap at the lap joint. Attaching the Blower Side Bezels The bezels are held on at the top by the bezel lip, which fits over the top of the blower housing frame, and are secured at the bottom by tabs that fit into slots on the cabinet side panels (Figure 19). Use the same procedure to attach the right and left blower side bezels. 24 Installing the System
-
 1
1 -
2
-
3
-
4
-
5
-
6
-
7
-
8
-
9
-
10
-
11
-
12
-
13
-
14
-
15
-
16
-
17
-
18
-
 19
19 -
 20
20 -
 21
21 -
 22
22 -
 23
23 -
 24
24 -
 25
25 -
 26
26 -
 27
27 -
 28
28 -
 29
29 -
30
-
31
-
32
-
33
-
34
-
35
-
36
-
37
-
38
-
39
-
40
-
41
-
42
-
43
-
44
-
45
-
46
-
47
-
48
-
49
-
50
-
51
-
52
-
53
-
54
-
55
-
56
-
57
-
58
-
59
-
60
-
61
-
62
 |
 |
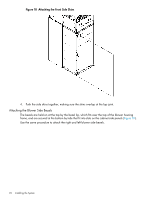
Figure 18 Attaching the Front Side Skins
4.
Push the side skins together, making sure the skins overlap at the lap joint.
Attaching the Blower Side Bezels
The bezels are held on at the top by the bezel lip, which fits over the top of the blower housing
frame, and are secured at the bottom by tabs that fit into slots on the cabinet side panels (
Figure 19
).
Use the same procedure to attach the right and left blower side bezels.
24
Installing the System