HP 9000 Superdome SX2000 HP Installation Guide, HP Integrity Superdome/sx2000 - Page 27
Installing the Lower Front Door Assembly
 |
View all HP 9000 Superdome SX2000 manuals
Add to My Manuals
Save this manual to your list of manuals |
Page 27 highlights
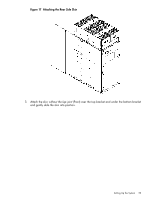
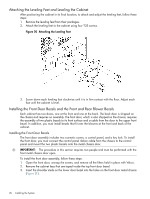
Figure 21 Installing the Lower Front Door Assembly 4. Using a T-10 driver, secure the lower door bezel to the front door chassis with 10 of the screws provided. Insert all screws loosely, then tighten them after the bezel is aligned. 5. While another person holds the upper door bezel near the door chassis, attach the ribbon cable to the back of the control panel on the bezel and tighten the two flathead screws (Figure 22). Setting Up the System 27
-
 1
1 -
2
-
3
-
4
-
5
-
6
-
7
-
8
-
9
-
10
-
11
-
12
-
13
-
14
-
15
-
16
-
17
-
18
-
19
-
20
-
21
-
 22
22 -
 23
23 -
 24
24 -
 25
25 -
 26
26 -
 27
27 -
 28
28 -
 29
29 -
 30
30 -
 31
31 -
 32
32 -
33
-
34
-
35
-
36
-
37
-
38
-
39
-
40
-
41
-
42
-
43
-
44
-
45
-
46
-
47
-
48
-
49
-
50
-
51
-
52
-
53
-
54
-
55
-
56
-
57
-
58
-
59
-
60
-
61
-
62
 |
 |
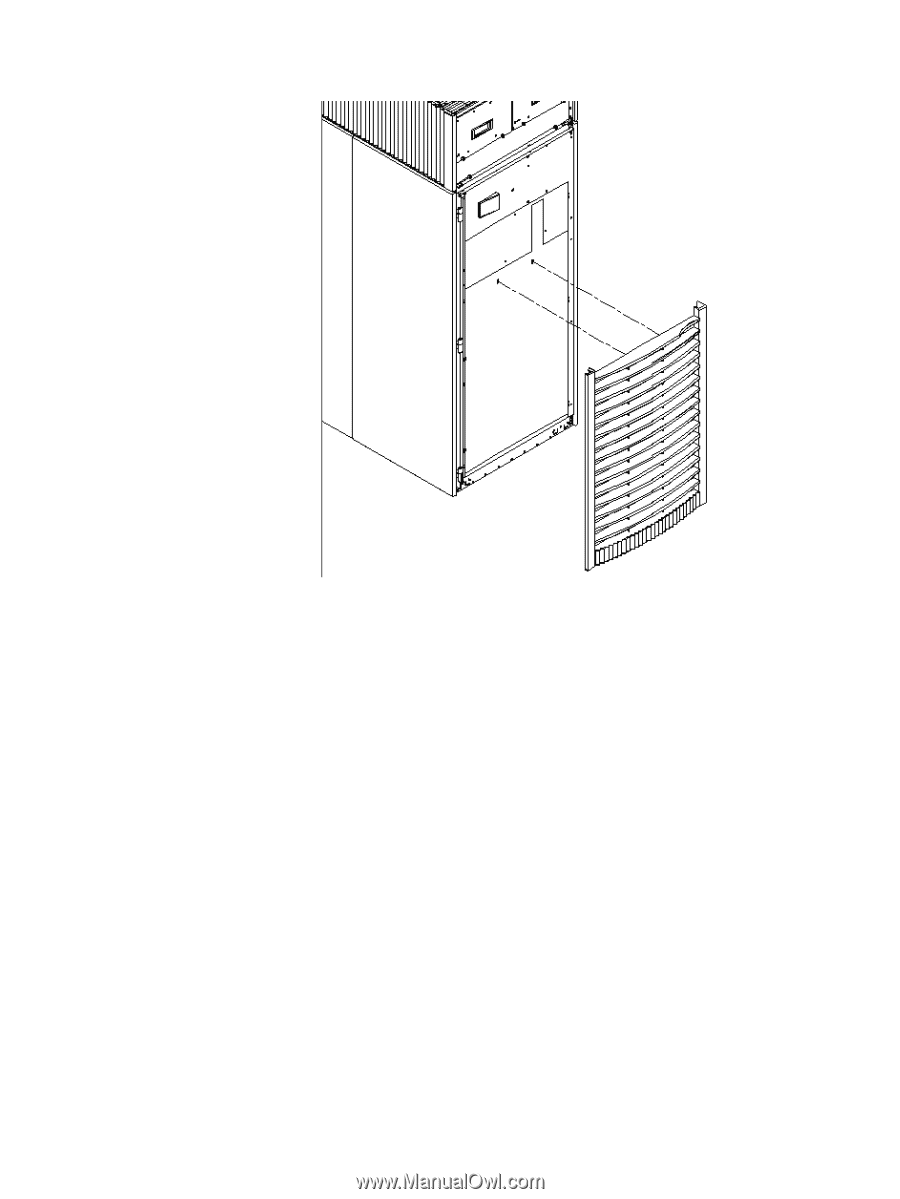
Figure 21 Installing the Lower Front Door Assembly
4.
Using a T-10 driver, secure the lower door bezel to the front door chassis with 10 of the screws
provided. Insert all screws loosely, then tighten them after the bezel is aligned.
5.
While another person holds the upper door bezel near the door chassis, attach the ribbon
cable to the back of the control panel on the bezel and tighten the two flathead screws
(
Figure 22
).
Setting Up the System
27