HP Cisco Catalyst Blade Switch 3020 Using HP Smart Update Manager with HP Inte - Page 14
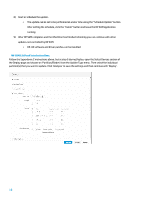
This report provides a full view of all the recommended updates that HP SUM would apply
 |
View all HP Cisco Catalyst Blade Switch 3020 manuals
Add to My Manuals
Save this manual to your list of manuals |
Page 14 highlights
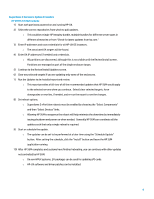
9) After confirming the updates to be performed, select 'Deploy' from the Action menu on the OA node. o Associated nodes will be listed to also be updated. Uncheck any that you do not want to update at this time. o Note: Updates on nodes will be sequenced. The OA node will update first and then VC and iLO nodes. o If any changes are made, click the 'Analyze' button to have HP SUM confirm the changes. o Click the 'Deploy' button to start the update process. 10) After OA, VC and iLO nodes have finished updating, add each of the HP-UX nodes using 'Add Node'. o Enter the IP address or DNS name and root credentials for each HP-UX instance. 11) Run Inventory on each HP-UX node o Select the current directory for the Baseline to be applied to the node. 12) After Inventory completes, select 'Reports' from the Action menu and run the Installable Details report on the HP-UX nodes and review. o You can select multiple nodes to run the report on at once using ctrl-click on the node names in the list on the left of the nodes page and then using the 'Generate Report' button. o This report provides a full view of all the recommended updates that HP SUM would apply to the selected node when you continue. 13) Start Deploy on each HP-UX node. o Be sure to set the Reboot option to 'If Needed' or 'Always' in order to fully activate the I/O FW updates that may require a reboot. 14) After HP SUM completes updates on each node and the systems have finished rebooting, you can continue with other updates not controlled by HP SUM. o On non-HP-UX systems, EFI packages can be used for updating I/O cards. o HP-UX software and driver patches can be installed. 14
-
 1
1 -
2
-
3
-
4
-
5
-
6
-
7
-
8
-
 9
9 -
 10
10 -
 11
11 -
 12
12 -
 13
13 -
 14
14 -
 15
15 -
 16
16 -
 17
17 -
 18
18 -
 19
19 -
20
-
21
-
22
-
23
-
24
-
25
-
26
-
27
-
28
-
29
-
30
-
31
-
32
-
33
-
34
 |
 |