HP Color Inkjet cp1160 HP Color Inkjet Printer CP1160 - (English) User Guide - Page 139
uninstall and reinstall instructions, Start, Programs, Hewlett-Packard, hp cp1160, uninstaller
 |
View all HP Color Inkjet cp1160 manuals
Add to My Manuals
Save this manual to your list of manuals |
Page 139 highlights
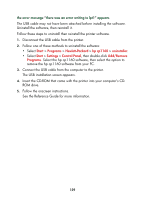
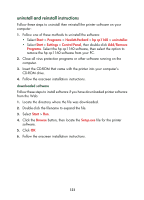
uninstall and reinstall instructions Follow these steps to uninstall then reinstall the printer software on your computer: 1. Follow one of these methods to uninstall the software: • Select Start > Programs > Hewlett-Packard > hp cp1160 > uninstaller. • Select Start > Settings > Control Panel, then double-click Add/Remove Programs. Select the hp cp1160 software, then select the option to remove the hp cp1160 software from your PC. 2. Close all virus protection programs or other software running on the computer. 3. Insert the CD-ROM that came with the printer into your computer's CD-ROM drive. 4. Follow the onscreen installation instructions. downloaded software Follow these steps to install software if you have downloaded printer software from the Web: 1. Locate the directory where the file was downloaded. 2. Double-click the filename to expand the file. 3. Select Start > Run. 4. Click the Browse button, then locate the Setup.exe file for the printer software. 5. Click OK. 6. Follow the onscreen installation instructions. 131
-
 1
1 -
2
-
3
-
4
-
5
-
6
-
7
-
8
-
9
-
10
-
11
-
12
-
13
-
14
-
15
-
16
-
17
-
18
-
19
-
20
-
21
-
22
-
23
-
24
-
25
-
26
-
27
-
28
-
29
-
30
-
31
-
32
-
33
-
34
-
35
-
36
-
37
-
38
-
39
-
40
-
41
-
42
-
43
-
44
-
45
-
46
-
47
-
48
-
49
-
50
-
51
-
52
-
53
-
54
-
55
-
56
-
57
-
58
-
59
-
60
-
61
-
62
-
63
-
64
-
65
-
66
-
67
-
68
-
69
-
70
-
71
-
72
-
73
-
74
-
75
-
76
-
77
-
78
-
79
-
80
-
81
-
82
-
83
-
84
-
85
-
86
-
87
-
88
-
89
-
90
-
91
-
92
-
93
-
94
-
95
-
96
-
97
-
98
-
99
-
100
-
101
-
102
-
103
-
104
-
105
-
106
-
107
-
108
-
109
-
110
-
111
-
112
-
113
-
114
-
115
-
116
-
117
-
118
-
119
-
120
-
121
-
122
-
123
-
124
-
125
-
126
-
127
-
128
-
129
-
130
-
131
-
132
-
133
-
 134
134 -
 135
135 -
 136
136 -
 137
137 -
 138
138 -
 139
139 -
 140
140 -
 141
141 -
 142
142 -
 143
143 -
 144
144 -
145
-
146
-
147
-
148
-
149
-
150
-
151
-
152
-
153
-
154
-
155
-
156
-
157
-
158
-
159
-
160
-
161
-
162
-
163
-
164
-
165
-
166
-
167
-
168
-
169
-
170
-
171
-
172
-
173
-
174
-
175
-
176
-
177
-
178
-
179
-
180
-
181
-
182
-
183
-
184
-
185
-
186
-
187
-
188
-
189
-
190
-
191
-
192
-
193
-
194
-
195
-
196
-
197
-
198
-
199
-
200
-
201
-
202
-
203
-
204
-
205
-
206
-
207
-
208
-
209
-
210
-
211
-
212
-
213
 |
 |