HP DesignJet Z6600 Using Your Printer - Page 10
Safety precautions, Product models, Use of this guide
 |
View all HP DesignJet Z6600 manuals
Add to My Manuals
Save this manual to your list of manuals |
Page 10 highlights
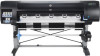
Safety precautions The following precautions ensure the correct use of the printer and prevent printer damage. Use these precautions at all times. ● Use the power supply voltage that is specified on the nameplate. To avoid overloading the printer's electrical outlet, do not use the outlet for multiple devices. ● Make sure that the printer is well-grounded. Failure to ground the printer can result in electrical shock, fire, and susceptibility to electromagnetic interference. ● Do not disassemble or repair the printer yourself, unless authorized by HP (see Customer Self Repair on page 188). Contact your local HP Service Representative for service. See HP Customer Care on page 185. ● Use only the electrical cord that HP supplied with the printer. Do not damage, cut, or repair the power cord. A damaged power cord creates a risk of fire and electric shock. Replace a damaged power cord with an HPapproved power cord. ● Do not allow metal or liquids (except those used in HP Cleaning Kits) to touch the internal parts of the printer. Doing so can cause fire, electric shock, or other serious hazards. ● Turn off the printer and unplug the power cable from the power outlet in any of the following cases: - When you place your hands inside the printer - If smoke or an unusual smell emanates from the printer - If the printer is making an unusual noise that does not occur during normal operation - If a piece of metal or a liquid (not part of cleaning and maintenance routines) touches internal parts of the printer - During an electrical (thunder or lightning) storm - During a power failure Product models This guide covers the following product models, normally referring to them by their short names for brevity. Full name HP DesignJet Z6600 Production HP DesignJet Z6800 Photo Production HP DesignJet Z6600 Production with PostScript/PDF upgrade HP DesignJet Z6800 Photo Production with PostScript/PDF upgrade Short name Z6600 Z6800 Z6600ps Z6800ps Part number F2S71A F2S72A F2S71A F2S72A Use of this guide This guide is the most complete source of information about this product and is organized into the following chapters. 2 Chapter 1 Introduction ENWW
-
 1
1 -
2
-
3
-
4
-
 5
5 -
 6
6 -
 7
7 -
 8
8 -
 9
9 -
 10
10 -
 11
11 -
 12
12 -
 13
13 -
 14
14 -
 15
15 -
16
-
17
-
18
-
19
-
20
-
21
-
22
-
23
-
24
-
25
-
26
-
27
-
28
-
29
-
30
-
31
-
32
-
33
-
34
-
35
-
36
-
37
-
38
-
39
-
40
-
41
-
42
-
43
-
44
-
45
-
46
-
47
-
48
-
49
-
50
-
51
-
52
-
53
-
54
-
55
-
56
-
57
-
58
-
59
-
60
-
61
-
62
-
63
-
64
-
65
-
66
-
67
-
68
-
69
-
70
-
71
-
72
-
73
-
74
-
75
-
76
-
77
-
78
-
79
-
80
-
81
-
82
-
83
-
84
-
85
-
86
-
87
-
88
-
89
-
90
-
91
-
92
-
93
-
94
-
95
-
96
-
97
-
98
-
99
-
100
-
101
-
102
-
103
-
104
-
105
-
106
-
107
-
108
-
109
-
110
-
111
-
112
-
113
-
114
-
115
-
116
-
117
-
118
-
119
-
120
-
121
-
122
-
123
-
124
-
125
-
126
-
127
-
128
-
129
-
130
-
131
-
132
-
133
-
134
-
135
-
136
-
137
-
138
-
139
-
140
-
141
-
142
-
143
-
144
-
145
-
146
-
147
-
148
-
149
-
150
-
151
-
152
-
153
-
154
-
155
-
156
-
157
-
158
-
159
-
160
-
161
-
162
-
163
-
164
-
165
-
166
-
167
-
168
-
169
-
170
-
171
-
172
-
173
-
174
-
175
-
176
-
177
-
178
-
179
-
180
-
181
-
182
-
183
-
184
-
185
-
186
-
187
-
188
-
189
-
190
-
191
-
192
-
193
-
194
-
195
-
196
-
197
-
198
-
199
-
200
-
201
-
202
-
203
-
204
-
205
-
206
-
207
-
208
-
209
-
210
-
211
-
212
-
213
-
214
-
215
-
216
-
217
-
218
-
219
-
220
-
221
-
222
-
223
-
224
-
225
-
226
-
227
-
228
-
229
-
230
-
231
-
232
 |
 |
