HP DesignJet Z6600 Using Your Printer - Page 35
Drying time, Supported paper types, Change active paper type, Automatic, Extended, Reduced, Manual
 |
View all HP DesignJet Z6600 manuals
Add to My Manuals
Save this manual to your list of manuals |
Page 35 highlights
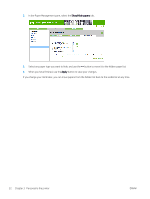
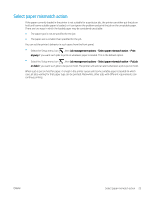
using Super Heavyweight Coated Paper and other cockle-free papers or make use of the take up reel when printing high-saturation area fills. ● Make sure that the appropriate print-quality setting (Best, Normal, or Fast) is selected. You can set the print quality in the driver, in the Embedded Web Server, or on the front panel. Driver or Embedded Web Server settings override front panel settings. The combination of paper type and print-quality settings tells the printer how to place the ink on the paper-for example, the ink density and halftoning method. See Select print quality on page 83. ● Although the ink systems that are supplied with this printer have good light-fastness, colors will eventually fade or change if exposed to sunlight over a long period of time ● If the paper type shown on the front panel does not correspond to the paper that you intend to use, take one of the following actions: - Reload the roll into the printer and select the correct paper type. See Unload a roll from the printer on page 35 and Load a roll into the printer on page 33. - Use the Embedded Web Server or the HP DesignJet Utility to reconfigure the paper type for the roll. - At the printer's front panel, select the icon, then Change active paper type. NOTE: The paper advance calibration is not performed when the paper type is changed from the front panel. Drying time With some paper types and under certain environmental conditions, the ink needs some time to dry before the paper is unloaded. The following settings are available for each paper type: ● Automatic: the printer automatically determines the appropriate drying time, based on the paper you have selected and the current temperature. If any drying time is required, a "drying time to go" countdown appears on the front panel. ● Extended: the default drying time is extended. This can be used if you find that the default drying time is sufficient to dry the ink. ● Reduced: the default drying time is reduced. This can be used if you want to get prints as fast as possible, and you find that the reduced drying time causes no significant problem in your environment. ● None: no drying time is provided. This can be used, for example, if you are manually removing the prints as quickly as the printer is producing them. ● Manual: this allows you to specify the drying time (in seconds). To change the drying time, see Change the drying time on page 46. Supported paper types The following table lists the most common paper types that are suitable for use with your printer, and shows the name that you should select on the front panel when loading each paper type. If you want to use an HP paper that does not appear on the front panel, go to http://www.hp.com/go/Z6600/paperpresets/ or http://www.hp.com/go/Z6800/paperpresets/ and download the appropriate paper preset according to your printer model. You need to download a preset only once; the printer stores it for future use and it subsequently appears in the front panel . For the part numbers, widths, and weights of these papers, see Order paper on page 48. ENWW Overview 27
-
 1
1 -
2
-
3
-
4
-
5
-
6
-
7
-
8
-
9
-
10
-
11
-
12
-
13
-
14
-
15
-
16
-
17
-
18
-
19
-
20
-
21
-
22
-
23
-
24
-
25
-
26
-
27
-
28
-
29
-
 30
30 -
 31
31 -
 32
32 -
 33
33 -
 34
34 -
 35
35 -
 36
36 -
 37
37 -
 38
38 -
 39
39 -
 40
40 -
41
-
42
-
43
-
44
-
45
-
46
-
47
-
48
-
49
-
50
-
51
-
52
-
53
-
54
-
55
-
56
-
57
-
58
-
59
-
60
-
61
-
62
-
63
-
64
-
65
-
66
-
67
-
68
-
69
-
70
-
71
-
72
-
73
-
74
-
75
-
76
-
77
-
78
-
79
-
80
-
81
-
82
-
83
-
84
-
85
-
86
-
87
-
88
-
89
-
90
-
91
-
92
-
93
-
94
-
95
-
96
-
97
-
98
-
99
-
100
-
101
-
102
-
103
-
104
-
105
-
106
-
107
-
108
-
109
-
110
-
111
-
112
-
113
-
114
-
115
-
116
-
117
-
118
-
119
-
120
-
121
-
122
-
123
-
124
-
125
-
126
-
127
-
128
-
129
-
130
-
131
-
132
-
133
-
134
-
135
-
136
-
137
-
138
-
139
-
140
-
141
-
142
-
143
-
144
-
145
-
146
-
147
-
148
-
149
-
150
-
151
-
152
-
153
-
154
-
155
-
156
-
157
-
158
-
159
-
160
-
161
-
162
-
163
-
164
-
165
-
166
-
167
-
168
-
169
-
170
-
171
-
172
-
173
-
174
-
175
-
176
-
177
-
178
-
179
-
180
-
181
-
182
-
183
-
184
-
185
-
186
-
187
-
188
-
189
-
190
-
191
-
192
-
193
-
194
-
195
-
196
-
197
-
198
-
199
-
200
-
201
-
202
-
203
-
204
-
205
-
206
-
207
-
208
-
209
-
210
-
211
-
212
-
213
-
214
-
215
-
216
-
217
-
218
-
219
-
220
-
221
-
222
-
223
-
224
-
225
-
226
-
227
-
228
-
229
-
230
-
231
-
232
 |
 |
