HP Designjet T790 HP Designjet T790 and T1300 ePrinter: User's Guide - English - Page 144
Introduction to the accessories, PostScript upgrade, Spindle, Jetdirect print server
 |
View all HP Designjet T790 manuals
Add to My Manuals
Save this manual to your list of manuals |
Page 144 highlights
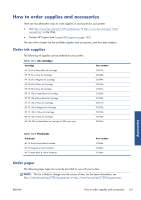
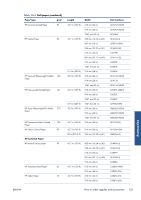
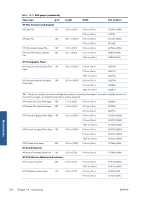
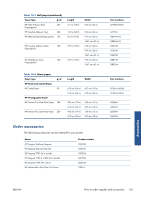
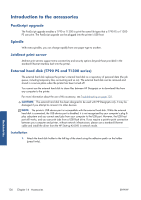
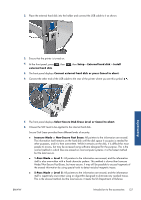
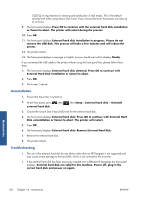
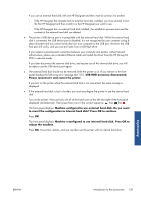
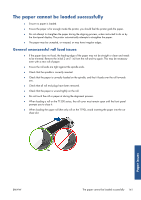
Introduction to the accessories PostScript upgrade The PostScript upgrade enables a T790 or T1300 to print the same file types that a T790 PS or T1300 PS can print. The PostScript upgrade can be plugged into the printer's USB host. Spindle With extra spindles, you can change rapidly from one paper type to another. Jetdirect print server Jetdirect print servers support extra connectivity and security options beyond those provided in the standard Ethernet interface built into the printer. External hard disk (T790 PS and T1300 series) The external hard disk replaces the printer's internal hard disk as a repository of personal data (the job queue, including temporary files, accounting and so on). The external hard disk can be removed and stored in a secure place when the printer has been turned off. You cannot use the external hard disk to share files between HP Designjets or to download files from any computer to the printer. For more information about the use of this accessory, see Troubleshooting on page 138. CAUTION: The external hard disk has been designed to be used with HP Designjets only. It may be damaged if you attempt to connect it to other devices. NOTE: The printer's USB device port is incompatible with the external hard disk. While the external hard disk is connected, the USB device port is disabled, it is not recognized by your computer's plug & play subsystem and you cannot send jobs from your computer to the USB port. However, the USB host port still works, and you can print jobs from a USB flash drive. If you require a point-to-point connection between your computer and printer, without network infrastructure, please use a standard Ethernet cable and install the driver from the HP Start-up Kit DVD in network mode. Installation 1. Attach the hard disk holder to the left leg of the stand using the adhesive patch on the holder (press firmly). Accessories 136 Chapter 14 Accessories ENWW
-
 1
1 -
2
-
3
-
4
-
5
-
6
-
7
-
8
-
9
-
10
-
11
-
12
-
13
-
14
-
15
-
16
-
17
-
18
-
19
-
20
-
21
-
22
-
23
-
24
-
25
-
26
-
27
-
28
-
29
-
30
-
31
-
32
-
33
-
34
-
35
-
36
-
37
-
38
-
39
-
40
-
41
-
42
-
43
-
44
-
45
-
46
-
47
-
48
-
49
-
50
-
51
-
52
-
53
-
54
-
55
-
56
-
57
-
58
-
59
-
60
-
61
-
62
-
63
-
64
-
65
-
66
-
67
-
68
-
69
-
70
-
71
-
72
-
73
-
74
-
75
-
76
-
77
-
78
-
79
-
80
-
81
-
82
-
83
-
84
-
85
-
86
-
87
-
88
-
89
-
90
-
91
-
92
-
93
-
94
-
95
-
96
-
97
-
98
-
99
-
100
-
101
-
102
-
103
-
104
-
105
-
106
-
107
-
108
-
109
-
110
-
111
-
112
-
113
-
114
-
115
-
116
-
117
-
118
-
119
-
120
-
121
-
122
-
123
-
124
-
125
-
126
-
127
-
128
-
129
-
130
-
131
-
132
-
133
-
134
-
135
-
136
-
137
-
138
-
 139
139 -
 140
140 -
 141
141 -
 142
142 -
 143
143 -
 144
144 -
 145
145 -
 146
146 -
 147
147 -
 148
148 -
 149
149 -
150
-
151
-
152
-
153
-
154
-
155
-
156
-
157
-
158
-
159
-
160
-
161
-
162
-
163
-
164
-
165
-
166
-
167
-
168
-
169
-
170
-
171
-
172
-
173
-
174
-
175
-
176
-
177
-
178
-
179
-
180
-
181
-
182
-
183
-
184
-
185
-
186
-
187
-
188
-
189
-
190
-
191
-
192
-
193
-
194
-
195
-
196
-
197
-
198
-
199
-
200
-
201
-
202
-
203
-
204
-
205
-
206
-
207
-
208
-
209
-
210
-
211
-
212
-
213
 |
 |