HP ENVY 15-bp100 Maintenance and Service Guide - Page 43
Memory module, Update BIOS before adding memory modules, Support & Drivers, Drivers & Software
 |
View all HP ENVY 15-bp100 manuals
Add to My Manuals
Save this manual to your list of manuals |
Page 43 highlights
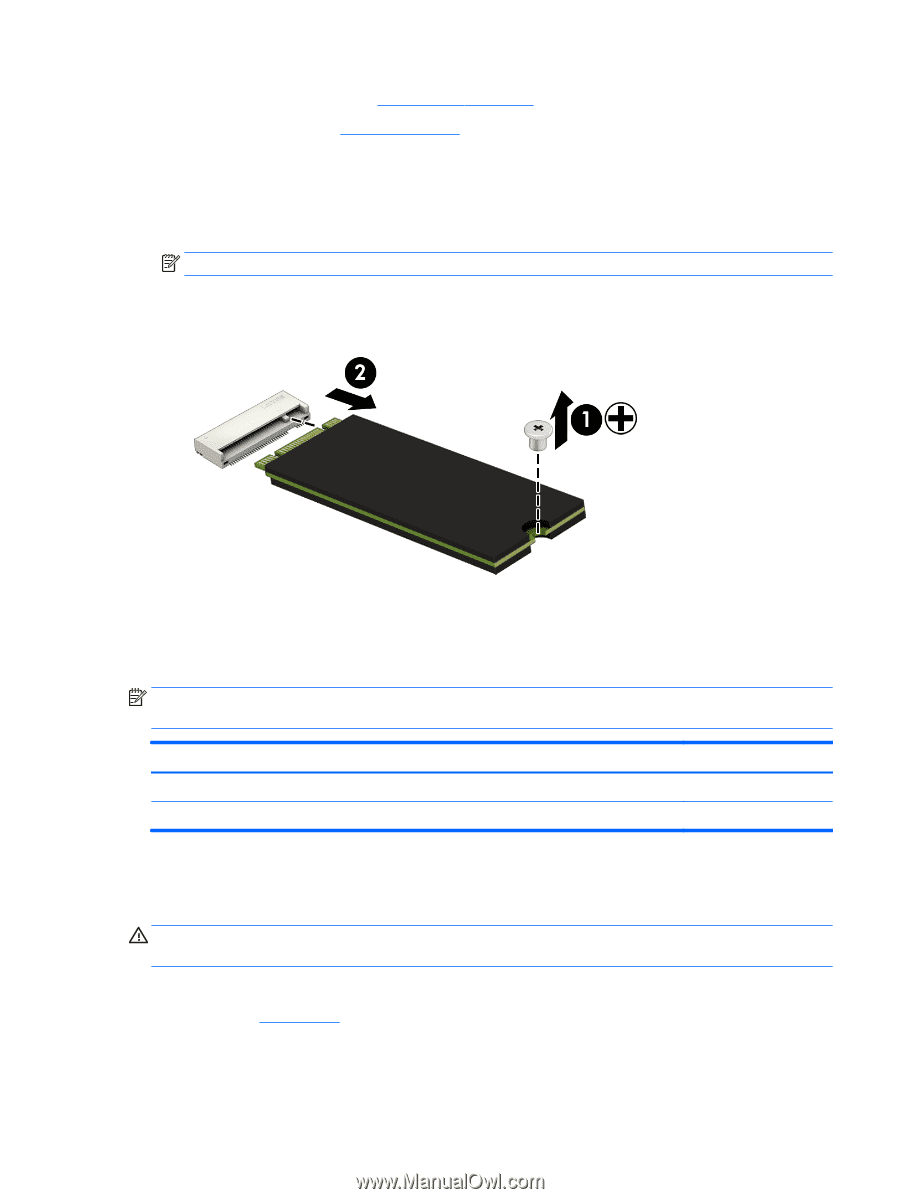
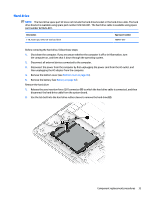
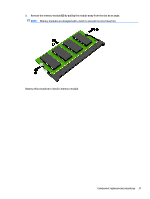
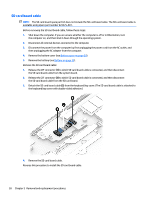
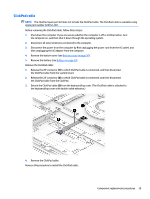
4. Remove the bottom cover (see Bottom cover on page 30). 5. Remove the battery (see Battery on page 32). Remove the solid-state drive: 1. Remove the Phillips PM2.0×2.4 broad head screw (1) that secures the solid-state drive to the system board. 2. Remove the solid-state drive (2) by pulling it away from the connector. NOTE: Solid-state drives are designed with notches to prevent incorrect insertion. Reverse this procedure to reassemble and install the solid-state drive. Memory module NOTE: Primary and expansion memory is installed in a side-by-side configuration on the system board. If only one memory module is installed, it must be installed in the socket labeled 1. Description 8-MB, SODIMM, DDR4-2400, 1.2-V 4-MB, SODIMM, DDR4-2400, 1.2-V Spare part number 862398-855 862397-855 Update BIOS before adding memory modules Before adding new memory, make sure you update the computer to the latest BIOS. CAUTION: Failure to update the computer to the latest BIOS prior to installing new memory may result in various system problems. To update BIOS: 1. Navigate to www.hp.com. 2. Click Support & Drivers, and then click Drivers & Software. 3. In the Enter a product name/number box, type the computer model information, and then click Search. Component replacement procedures 35
-
 1
1 -
2
-
3
-
4
-
5
-
6
-
7
-
8
-
9
-
10
-
11
-
12
-
13
-
14
-
15
-
16
-
17
-
18
-
19
-
20
-
21
-
22
-
23
-
24
-
25
-
26
-
27
-
28
-
29
-
30
-
31
-
32
-
33
-
34
-
35
-
36
-
37
-
 38
38 -
 39
39 -
 40
40 -
 41
41 -
 42
42 -
 43
43 -
 44
44 -
 45
45 -
 46
46 -
 47
47 -
 48
48 -
49
-
50
-
51
-
52
-
53
-
54
-
55
-
56
-
57
-
58
-
59
-
60
-
61
-
62
-
63
-
64
-
65
-
66
-
67
-
68
-
69
-
70
-
71
-
72
-
73
-
74
-
75
-
76
-
77
-
78
-
79
-
80
-
81
-
82
-
83
-
84
-
85
-
86
-
87
-
88
-
89
-
90
 |
 |