HP EVA P6550 HP P6000 EVA Updating Product Software Guide (XCS 11200000) (5697 - Page 55
Step 6. Upgrading the disk drive firmware, requires HP Services.
 |
View all HP EVA P6550 manuals
Add to My Manuals
Save this manual to your list of manuals |
Page 55 highlights
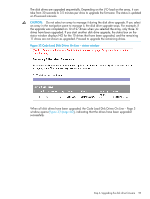
You can reset the I/O module in one of two ways: • Reset each I/O module individually-Use this method to reset up to five I/O modules or if an offline upgrade is not possible. I/O throughput is briefly reduced but does not stop host I/O so you can do an online controller software upgrade. Further, resetting a few I/O modules individually will not take long. • Power cycle the array-Use this method of you need to reset six or more I/O modules or if an offline upgrade is possible. Although power cycling an array will interrupt I/O and require an offline upgrade, it will take less time than resetting several I/O modules individually. If an offline upgrade is not possible, you can reset the I/O modules individually. To reset the I/O modules individually: • Remove and then reinsert the I/O module in each disk enclosure. See the HP Disk Enclosure I/O Module Replacement Instructions. See "Related information" (page 70) for the link to this document. • Insert a serial cable into the I/O module and issue the reset command using the serial line (requires HP Services). To power cycle the array: 1. Complete an orderly shutdown of both controllers from HP P6000 Command View. Then, power down the array: • On the EVA4400, press and hold the enclosure power button on the rear of the controller for a minimum of 15 seconds. The power button and the green LED start to blink when held from 4 to 10 seconds. • On the EVA6400/8400, press and release the power button on the rear of the controller. The power LED turns amber and the shutdown process is complete. • To power down the shelf, ensure that the controllers have shut down, and then remove both power cables from all enclosures. Alternatively, you can power down the entire rack. 2. Power on the array: a. Power on the circuit breakers on both array rack power distribution units. Verify that all disk enclosures are operating properly. The status indicator and the power indicator should be on (green). b. Power on each controller (EVA6400/8400) or the controller enclosure (EVA4400). Allow the array to fully start up. c. Start HP P6000 Command View and verify connection to the array. If the array is not visible, click Settings on the navigation pane (located at the lower portion of the page), and then click P6000 CV - ServerName. On the content pane, click Discover Storage Systems to allow HP P6000 Command View to discover the array. d. Verify the status of each host before enabling access. Step 6. Upgrading the disk drive firmware Estimated time to complete: Varies depending on the number of disk drives that require upgrading and the I/O load on the array. It can take from 30 seconds to 3.5 minutes per drive to upgrade the firmware. Review the following guidelines before proceeding with the upgrade: • You can be using array-based or server-based management to upgrade the disk drive firmware. • Check the disk group occupancy alarm setting before upgrading disk drive firmware. See the best practices configuration white paper for guidelines on how to configure this setting based on your capacity. Locate the white paper for your array model at: http://h18006.www1.hp.com/storage/arraywhitepapers.html Step 6. Upgrading the disk drive firmware 55
-
 1
1 -
2
-
3
-
4
-
5
-
6
-
7
-
8
-
9
-
10
-
11
-
12
-
13
-
14
-
15
-
16
-
17
-
18
-
19
-
20
-
21
-
22
-
23
-
24
-
25
-
26
-
27
-
28
-
29
-
30
-
31
-
32
-
33
-
34
-
35
-
36
-
37
-
38
-
39
-
40
-
41
-
42
-
43
-
44
-
45
-
46
-
47
-
48
-
49
-
 50
50 -
 51
51 -
 52
52 -
 53
53 -
 54
54 -
 55
55 -
 56
56 -
 57
57 -
 58
58 -
 59
59 -
 60
60 -
61
-
62
-
63
-
64
-
65
-
66
-
67
-
68
-
69
-
70
-
71
-
72
-
73
 |
 |
