HP Indigo WS6600 Splice Detection System Installation and Troubleshooting -- C - Page 31
Calibrating the splice detection sensors, Defining, activating, and deactivating splice detection
 |
View all HP Indigo WS6600 manuals
Add to My Manuals
Save this manual to your list of manuals |
Page 31 highlights
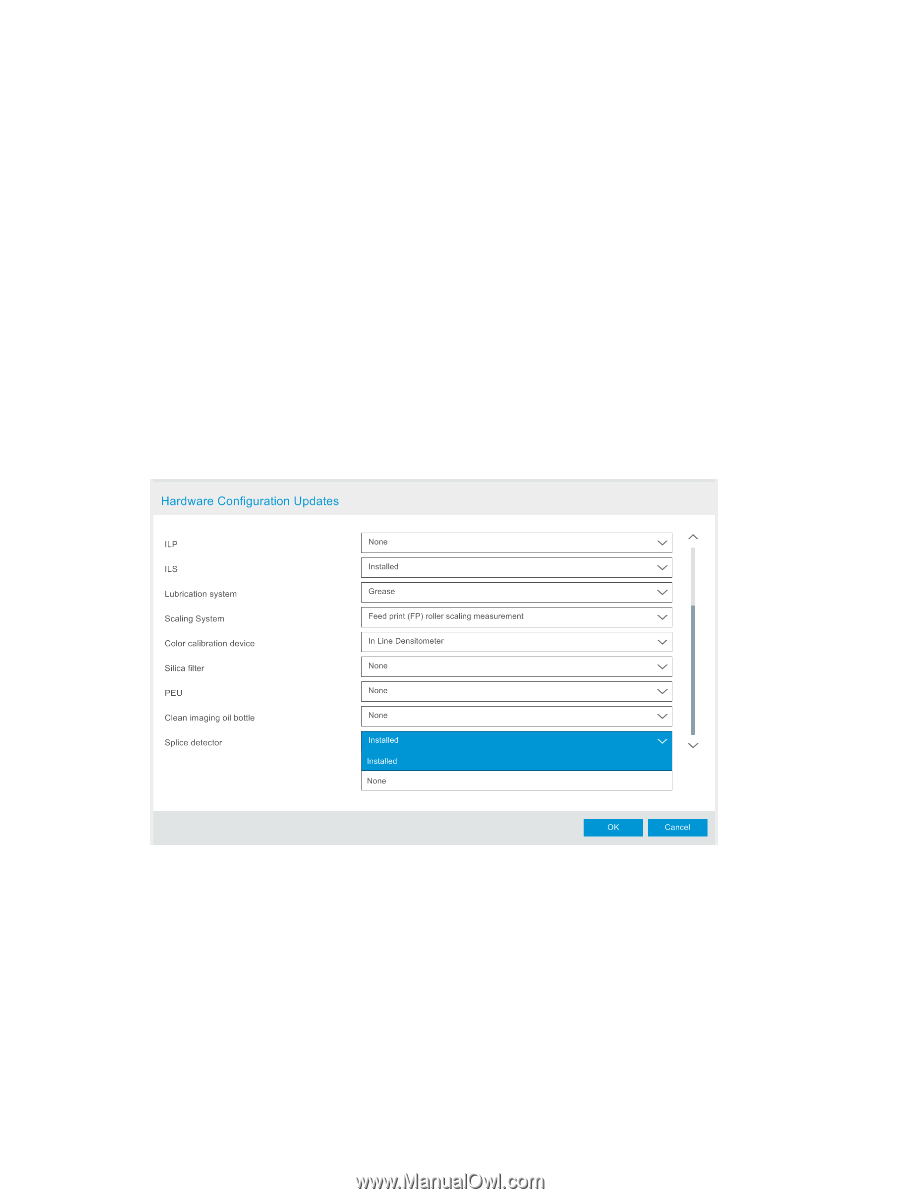
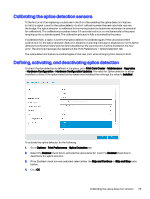
Calibrating the splice detection sensors At the first print after replacing a substrate in the UI or after enabling the splice detection feature in the UI, a signal is sent to the splice detector to start calibrating when the new substrate reaches the bridge. The splice detector is calibrated to the moving substrate (substrate movement is essential for calibration). This calibration procedure takes 2-3 seconds and occurs simultaneously to the press ramping up the substrate speed. The calibration process is fully automated by the press. If calibration fails, a signal is sent to the splice detector to calibrate again. If the second and third calibrations fail, the splice detection feature is disabled. A warning message is displayed in the UI: Splice detection verification failed and has been disabled for the current print. It will be enabled in the next print. The warning message also appears in the Print Preferences > Splice Detection tab. The splice detection feature is enabled again at the next print, when changing from Ready to Print. Defining, activating, and deactivating splice detection To check if splice detection is defined in the press, go to Print Care Center > Maintenance > Upgrades > Hardware Configuration > Hardware Configuration Updates. The value for Splice detector is either Installed or None. If the splice detection hardware was installed, then change the value to Installed. To activate the splice detector, do the following: 1. Go to Options > Print Preferences > Splice Detection tab. 2. Select the Enabled check box to activate the splice detector. Clear the Enabled check box to deactivate the splice detector. 3. If the Enabled check box was selected, select either the Skip and Continue or Skip and Stop radio button. 4. Click OK. Calibrating the splice detection sensors 29
-
 1
1 -
2
-
3
-
4
-
5
-
6
-
7
-
8
-
9
-
10
-
11
-
12
-
13
-
14
-
15
-
16
-
17
-
18
-
19
-
20
-
21
-
22
-
23
-
24
-
25
-
 26
26 -
 27
27 -
 28
28 -
 29
29 -
 30
30 -
 31
31 -
 32
32 -
 33
33 -
 34
34 -
 35
35 -
 36
36 -
37
-
38
-
39
-
40
-
41
-
42
-
43
-
44
-
45
-
46
 |
 |