HP LaserJet M700 User Guide - Page 82
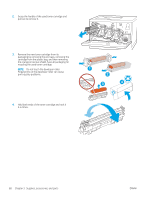
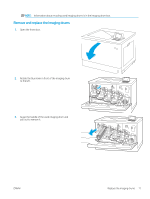
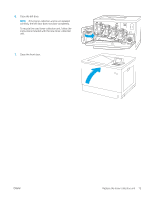
hand while holding the handle with the other. Align, Support the imaging drum underneath with one
 |
View all HP LaserJet M700 manuals
Add to My Manuals
Save this manual to your list of manuals |
Page 82 highlights
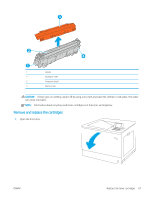
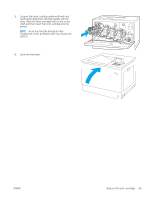
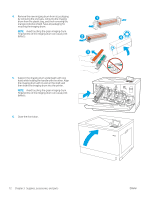
4. Remove the new imaging drum from its packaging by removing the end caps, removing the imaging 1 drum from the plastic bag, and then removing the orange protective shield. Save all packaging for recycling the imaging drum. NOTE: Avoid touching the green imaging drum. Fingerprints on the imaging drum can cause print defects. 2 4 3 5. Support the imaging drum underneath with one hand while holding the handle with the other. Align the imaging drum with its slot on the shelf, and then insert the imaging drum into the printer. NOTE: Avoid touching the green imaging drum. Fingerprints on the imaging drum can cause print defects. 6. Close the front door. 72 Chapter 3 Supplies, accessories, and parts ENWW
-
 1
1 -
2
-
3
-
4
-
5
-
6
-
7
-
8
-
9
-
10
-
11
-
12
-
13
-
14
-
15
-
16
-
17
-
18
-
19
-
20
-
21
-
22
-
23
-
24
-
25
-
26
-
27
-
28
-
29
-
30
-
31
-
32
-
33
-
34
-
35
-
36
-
37
-
38
-
39
-
40
-
41
-
42
-
43
-
44
-
45
-
46
-
47
-
48
-
49
-
50
-
51
-
52
-
53
-
54
-
55
-
56
-
57
-
58
-
59
-
60
-
61
-
62
-
63
-
64
-
65
-
66
-
67
-
68
-
69
-
70
-
71
-
72
-
73
-
74
-
75
-
76
-
 77
77 -
 78
78 -
 79
79 -
 80
80 -
 81
81 -
 82
82 -
 83
83 -
 84
84 -
 85
85 -
 86
86 -
 87
87 -
88
-
89
-
90
-
91
-
92
-
93
-
94
-
95
-
96
-
97
-
98
-
99
-
100
-
101
-
102
-
103
-
104
-
105
-
106
-
107
-
108
-
109
-
110
-
111
-
112
-
113
-
114
-
115
-
116
-
117
-
118
-
119
-
120
-
121
-
122
-
123
-
124
-
125
-
126
-
127
-
128
-
129
-
130
-
131
-
132
-
133
-
134
-
135
-
136
-
137
-
138
-
139
-
140
-
141
-
142
-
143
-
144
-
145
-
146
-
147
-
148
-
149
-
150
-
151
-
152
-
153
-
154
-
155
-
156
-
157
-
158
-
159
-
160
-
161
-
162
-
163
-
164
-
165
-
166
-
167
-
168
-
169
-
170
-
171
-
172
-
173
-
174
-
175
-
176
-
177
-
178
-
179
-
180
-
181
-
182
-
183
-
184
-
185
-
186
-
187
-
188
-
189
-
190
 |
 |
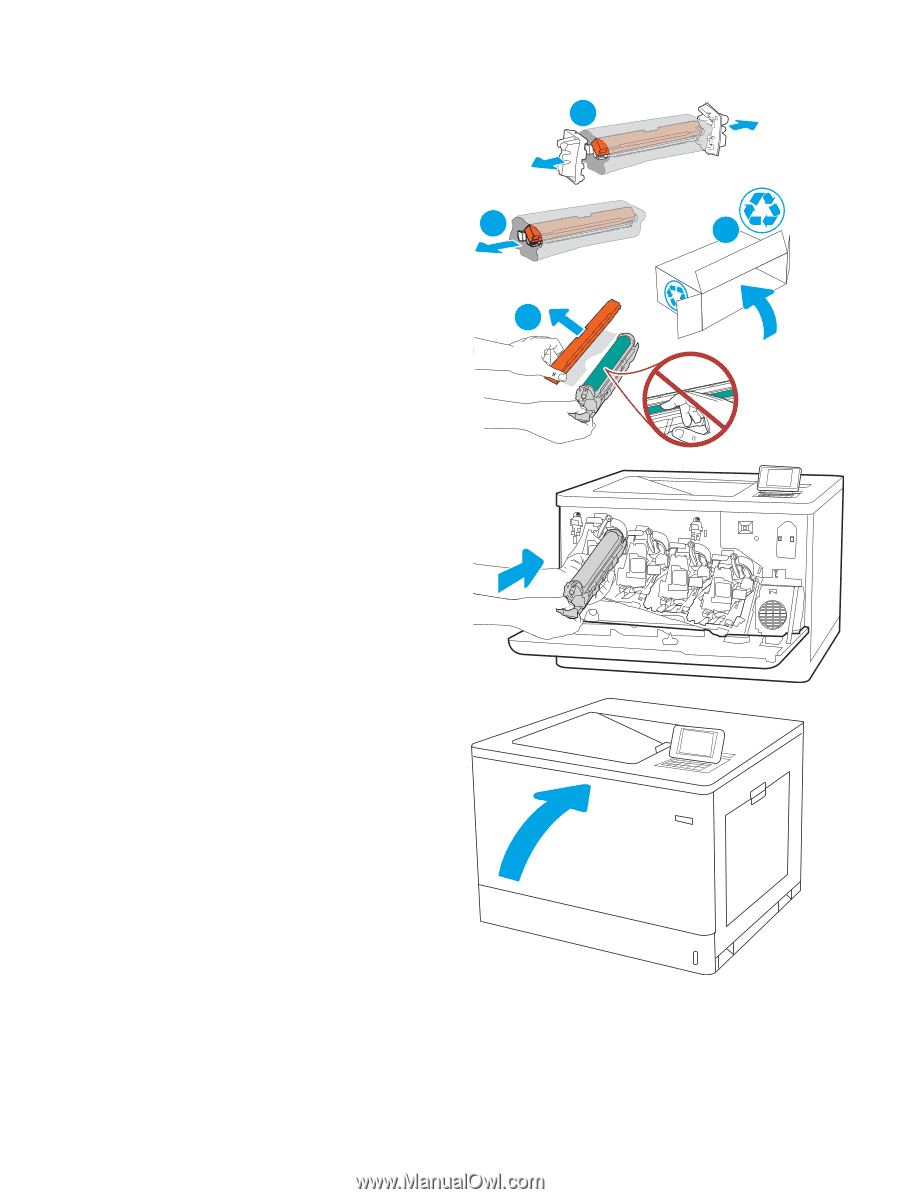
4.
Remove the new imaging drum from its packaging
by removing the end caps, removing the imaging
drum from the plastic bag, and then removing the
orange protective shield. Save all packaging for
recycling the imaging drum.
NOTE:
Avoid touching the green imaging drum.
Fingerprints on the imaging drum can cause print
defects.
2
1
3
4
5.
Support the imaging drum underneath with one
hand while holding the handle with the other. Align
the imaging drum with its slot on the shelf, and
then insert the imaging drum into the printer.
NOTE:
Avoid touching the green imaging drum.
Fingerprints on the imaging drum can cause print
defects.
6.
Close the front door.
72
Chapter 3
Supplies, accessories, and parts
ENWW