HP LaserJet Pro 100 Service Manual - Page 31
Separation pad assembly, WARNING,
 |
View all HP LaserJet Pro 100 manuals
Add to My Manuals
Save this manual to your list of manuals |
Page 31 highlights
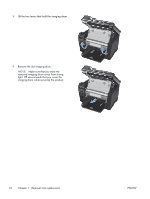
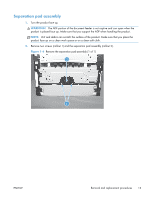
Separation pad assembly 1. Turn the product face up. WARNING! The ADF portion of the document feeder is not captive and can open when the product is placed face up. Make sure that you support the ADF when handling the product. NOTE: Dirt and debris can scratch the surface of the product. Make sure that you place the product face up on a clean work space or on a clean soft cloth. 2. Remove two screws (callout 1) and the separation pad assembly (callout 2). Figure 1-6 Remove the separation pad assembly (1 of 1) 2 1 ENWW Removal and replacement procedures 13
-
 1
1 -
2
-
3
-
4
-
5
-
6
-
7
-
8
-
9
-
10
-
11
-
12
-
13
-
14
-
15
-
16
-
17
-
18
-
19
-
20
-
21
-
22
-
23
-
24
-
25
-
 26
26 -
 27
27 -
 28
28 -
 29
29 -
 30
30 -
 31
31 -
 32
32 -
 33
33 -
 34
34 -
 35
35 -
 36
36 -
37
-
38
-
39
-
40
-
41
-
42
-
43
-
44
-
45
-
46
-
47
-
48
-
49
-
50
-
51
-
52
-
53
-
54
-
55
-
56
-
57
-
58
-
59
-
60
-
61
-
62
-
63
-
64
-
65
-
66
-
67
-
68
-
69
-
70
-
71
-
72
-
73
-
74
-
75
-
76
-
77
-
78
-
79
-
80
-
81
-
82
-
83
-
84
-
85
-
86
-
87
-
88
-
89
-
90
-
91
-
92
-
93
-
94
-
95
-
96
-
97
-
98
-
99
-
100
-
101
-
102
-
103
-
104
-
105
-
106
-
107
-
108
-
109
-
110
-
111
-
112
-
113
-
114
-
115
-
116
-
117
-
118
-
119
-
120
-
121
-
122
-
123
-
124
-
125
-
126
-
127
-
128
-
129
-
130
-
131
-
132
-
133
-
134
-
135
-
136
-
137
-
138
-
139
-
140
-
141
-
142
-
143
-
144
-
145
-
146
-
147
-
148
-
149
-
150
-
151
-
152
-
153
-
154
-
155
-
156
-
157
-
158
-
159
-
160
-
161
-
162
-
163
-
164
-
165
-
166
-
167
-
168
-
169
-
170
 |
 |
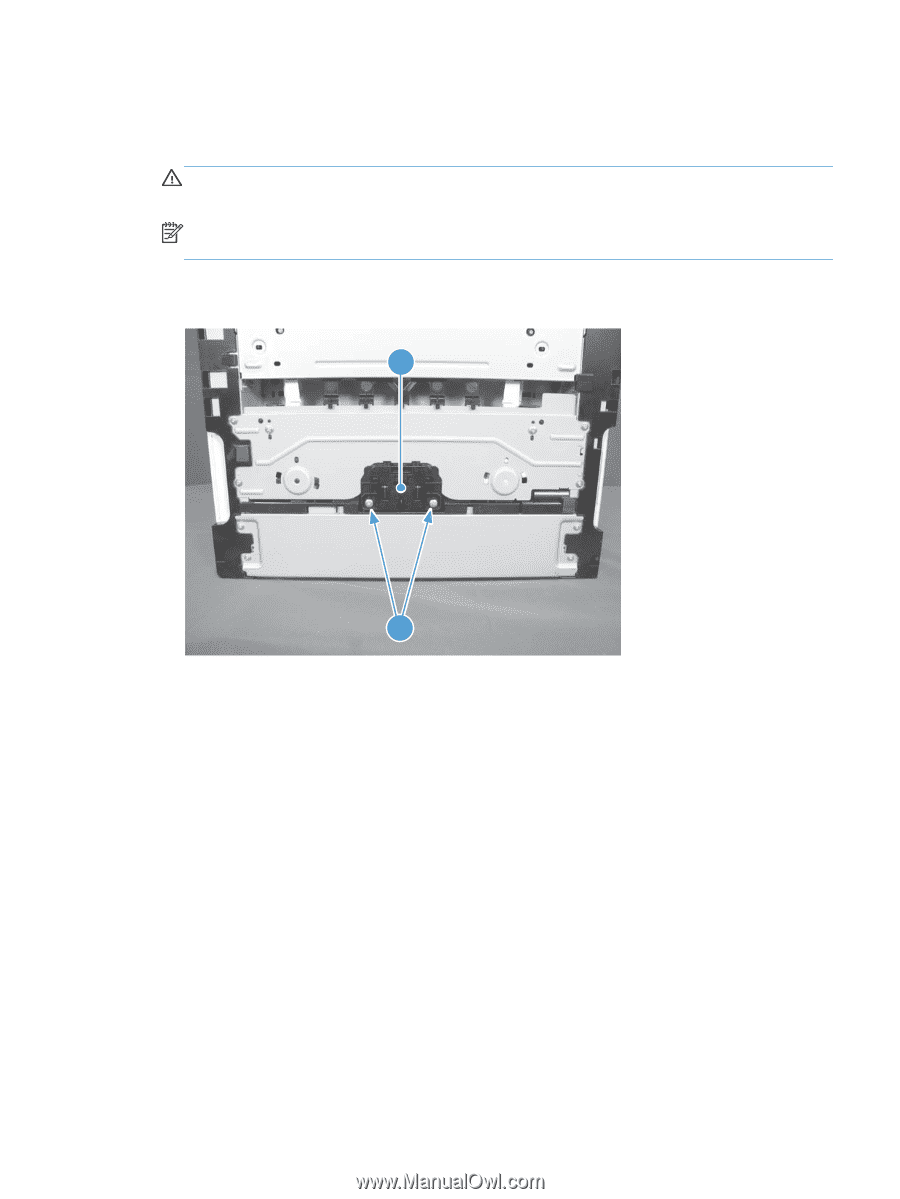
Separation pad assembly
1.
Turn the product face up.
WARNING!
The ADF portion of the document feeder is not captive and can open when the
product is placed face up. Make sure that you support the ADF when handling the product.
NOTE:
Dirt and debris can scratch the surface of the product. Make sure that you place the
product face up on a clean work space or on a clean soft cloth.
2.
Remove two screws (callout 1) and the separation pad assembly (callout 2).
Figure 1-6
Remove the separation pad assembly (1 of 1)
2
1
ENWW
Removal and replacement procedures
13