HP Management LAN Blade for bh7800 Installation Guide, Second Edition - HP Car - Page 44
Releasing Locking Levers
 |
View all HP Management LAN Blade for bh7800 manuals
Add to My Manuals
Save this manual to your list of manuals |
Page 44 highlights
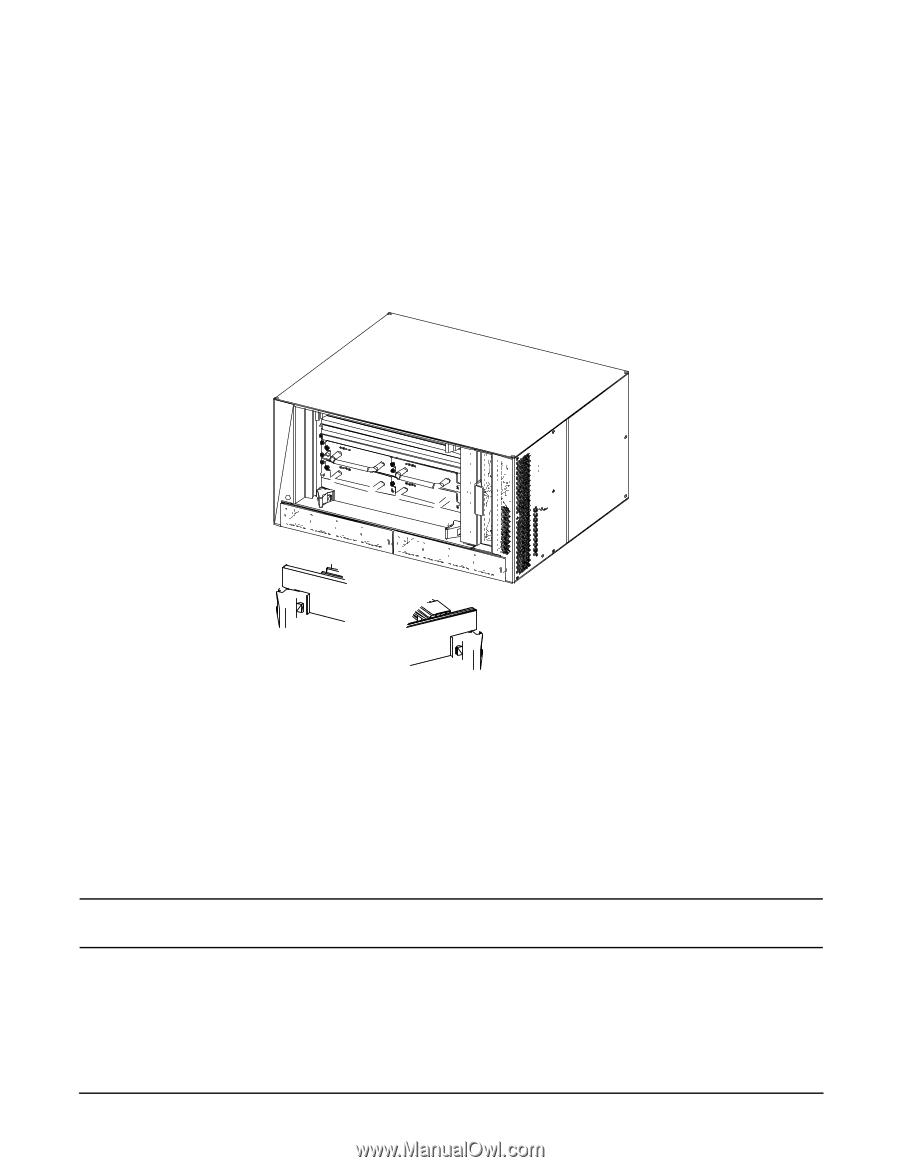
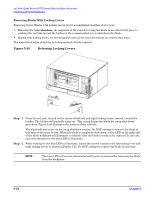
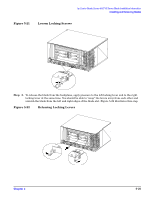
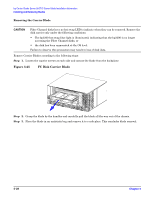
hp Carrier Grade Server bh3710 Server Blade Installation Information Installing and Removing Blades Removing Blades With Locking Levers Removing Server Blades with locking levers can be accomplished in either of two ways: • Entering the /etc/shutdown -h command at the console to bring the blade to an orderly halt prior to pushing the red tabs toward the latches is the recommended way to shut down the blade. • Blades with locking levers are hot swappable and can be removed without an orderly shut down. The steps listed below detail the hot swap method of blade removal. Figure 5-20 Releasing Locking Levers Step 1. Press the red tabs, located on the inside of both left and right locking levers, inward, toward the latches. The latches will partially snap out. This action begins the blade hot swap shut-down procedure. Figure 5-20 illustrates the location of the red tabs. The blade will now enter its hot swap shutdown routine. Do NOT attempt to remove the blade at this time or data may be lost. When the blade is completely shut down, a blue LED on the right side of the blade bulkhead will illuminate to indicate that the blade is ready to be removed. It can take up to two minutes for the blue LED to illuminate. Step 2. While waiting for the blue LED to illuminate, loosen the screws located in the left locking lever and right locking levers as shown in Figure 5-21. Do NOT attempt to remove the blade at this time. NOTE The blue LED will remain illuminated until power is removed by loosening the blade from the backplane 5- 24 Chapter 5
-
 1
1 -
2
-
3
-
4
-
5
-
6
-
7
-
8
-
9
-
10
-
11
-
12
-
13
-
14
-
15
-
16
-
17
-
18
-
19
-
20
-
21
-
22
-
23
-
24
-
25
-
26
-
27
-
28
-
29
-
30
-
31
-
32
-
33
-
34
-
35
-
36
-
37
-
38
-
 39
39 -
 40
40 -
 41
41 -
 42
42 -
 43
43 -
 44
44 -
 45
45 -
 46
46 -
 47
47 -
 48
48 -
 49
49 -
50
-
51
-
52
-
53
-
54
-
55
 |
 |