HP PageWide XL 8000 User guide - Page 29
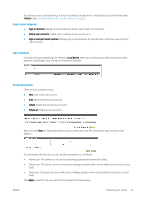
Sign-in methods, Device user accounts, in at least the name and the email
 |
View all HP PageWide XL 8000 manuals
Add to My Manuals
Save this manual to your list of manuals |
Page 29 highlights
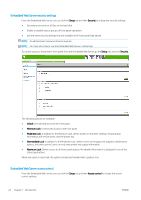
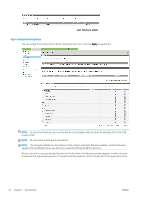
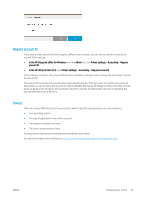
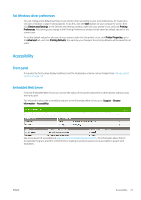
To use these access control settings, the security settings should permit unrestricted access to the front panel (Unlock). See Embedded Web Server security settings on page 21. Access control categories ● Sign-in methods: Manage the methods that can be used to sign in to the printer. ● Device user accounts: Create, edit, or delete printer user accounts. ● Sign-in and permission policies: Manage sign-in requirements for specific tasks, restricting user access by type of activity. Sign-in methods Currently, the only available sign-in method is Local device, referring to local accounts that have access codes between 4 and 8 digits long, stored on the printer's hard disk. Device user accounts There are four available actions: ● New: Add a new user account. ● Edit: Edit the selected user account. ● Delete: Delete the selected user account. ● Delete all: Delete all user accounts. When you click New, the following window opens, in which you must fill in at least the name and the email address. You can change the user access code, and the permission set, as follows: ● Admin user: The admin user has all access privileges granted and cannot be edited. ● Device user: The device user has some access privileges granted, which can be edited on the access control page. ● Guest user: The guest user has some access privileges granted, which can be edited on the access control page. Click Apply to add the new user, who is then displayed as shown below. ENWW Preparing your printer 23
-
 1
1 -
2
-
3
-
4
-
5
-
6
-
7
-
8
-
9
-
10
-
11
-
12
-
13
-
14
-
15
-
16
-
17
-
18
-
19
-
20
-
21
-
22
-
23
-
 24
24 -
 25
25 -
 26
26 -
 27
27 -
 28
28 -
 29
29 -
 30
30 -
 31
31 -
 32
32 -
 33
33 -
 34
34 -
35
-
36
-
37
-
38
-
39
-
40
-
41
-
42
-
43
-
44
-
45
-
46
-
47
-
48
-
49
-
50
-
51
-
52
-
53
-
54
-
55
-
56
-
57
-
58
-
59
-
60
-
61
-
62
-
63
-
64
-
65
-
66
-
67
-
68
-
69
-
70
-
71
-
72
-
73
-
74
-
75
-
76
-
77
-
78
-
79
-
80
-
81
-
82
-
83
-
84
-
85
-
86
-
87
-
88
-
89
-
90
-
91
-
92
-
93
-
94
-
95
-
96
-
97
-
98
-
99
-
100
-
101
-
102
-
103
-
104
-
105
-
106
-
107
-
108
-
109
-
110
-
111
-
112
-
113
-
114
-
115
-
116
-
117
-
118
-
119
-
120
-
121
-
122
-
123
-
124
-
125
-
126
-
127
-
128
-
129
-
130
-
131
-
132
-
133
-
134
-
135
-
136
-
137
-
138
-
139
-
140
-
141
-
142
-
143
-
144
-
145
-
146
-
147
-
148
-
149
-
150
 |
 |
