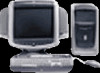
HP Pavilion 7700 HP Pavilion Home PC - (English) Upgrading and Servicing the P - Page 10
has two small notches on the lower edge
 |
View all HP Pavilion 7700 manuals
Add to My Manuals
Save this manual to your list of manuals |
Page 10 highlights
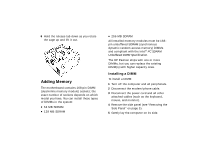
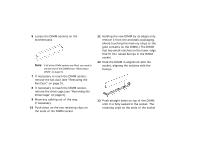
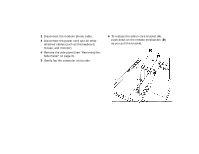
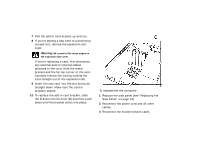
6 Locate the DIMM sockets on the motherboard. Note: If all of the DIMM sockets are filled, you need to remove one of the DIMMs (see "Removing a DIMM" on page 9). 7 If necessary to reach the DIMM socket, remove the fan duct (see "Removing the Fan Duct" on page 5). 8 If necessary to reach the DIMM socket, remove the drive cage (see "Removing the Drive Cage" on page 5). 9 Move any cabling out of the way, if necessary. 10 Push down on the two retaining clips on the ends of the DIMM socket. 11 Holding the new DIMM by its edges only, remove it from the antistatic packaging. (Avoid touching the memory chips or the gold contacts on the DIMM.) The DIMM has two small notches on the lower edge that fit into raised bumps in the DIMM socket. 12 Hold the DIMM in alignment with the socket, aligning the notches with the bumps. 13 Push straight down on top of the DIMM until it is fully seated in the socket. The retaining clips on the ends of the socket
-
 1
1 -
2
-
3
-
4
-
 5
5 -
 6
6 -
 7
7 -
 8
8 -
 9
9 -
 10
10 -
 11
11 -
 12
12 -
 13
13 -
 14
14 -
 15
15 -
16
-
17
-
18
-
19
-
20
-
21
-
22
-
23
-
24
-
25
-
26
-
27
-
28
-
29
-
30
-
31
-
32
-
33
-
34
-
35
-
36
-
37
-
38
-
39
-
40
-
41
-
42
-
43
-
44
-
45
 |
 |
