HP Pavilion 7700 HP Pavilion Home PC - (English) Upgrading and Servicing the P - Page 17
Replacing the Diskette Drive
 |
View all HP Pavilion 7700 manuals
Add to My Manuals
Save this manual to your list of manuals |
Page 17 highlights
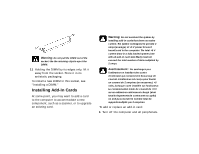
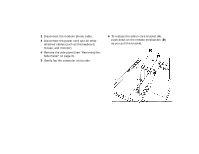
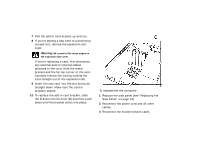
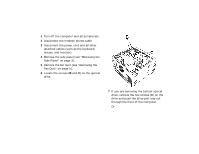
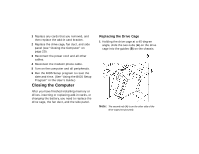
2 Disconnect the modem/phone cable. 3 Disconnect the power cord and all other attached cables (such as the keyboard, mouse, and monitor). 4 Remove the side panel (see "Removing the Side Panel" on page 3). 5 Remove the drive cage (see "Removing the Drive Cage" on page 5). 6 Remove the two screws on the side of the hard drive. 7 Pull the hard drive out, and store the drive and screws in a safe location. 8 Replace the drive cage and the side panel (see "Closing the Computer" on page 20). Replacing the Diskette Drive If you need to replace the diskette drive, you can remove the existing drive and install a new one. To ensure that the drive fits properly into the HP Pavilion, be sure to purchase the replacement diskette drive from HP. Refer to your support path card for the telephone number of the HP Customer Care Center. To remove the existing diskette drive: 1 Turn off the computer and all peripherals. 2 Disconnect the modem/phone cable. 3 Disconnect the power cord and all other attached cables (such as the keyboard, mouse, and monitor). 4 Remove the side panel (see "Removing the Side Panel" on page 3). 5 Remove the drive cage (see "Removing the Drive Cage" on page 5). 6 Remove the screw (A) on each side of the diskette drive.
-
 1
1 -
2
-
3
-
4
-
5
-
6
-
7
-
8
-
9
-
10
-
11
-
 12
12 -
 13
13 -
 14
14 -
 15
15 -
 16
16 -
 17
17 -
 18
18 -
 19
19 -
 20
20 -
 21
21 -
 22
22 -
23
-
24
-
25
-
26
-
27
-
28
-
29
-
30
-
31
-
32
-
33
-
34
-
35
-
36
-
37
-
38
-
39
-
40
-
41
-
42
-
43
-
44
-
45
 |
 |
