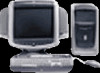
HP Pavilion 7700 HP Pavilion Home PC - (English) Upgrading and Servicing the P - Page 6
Grasp the handle
 |
View all HP Pavilion 7700 manuals
Add to My Manuals
Save this manual to your list of manuals |
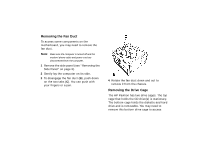
Page 6 highlights
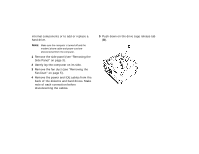
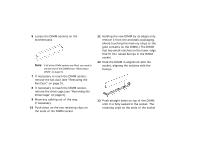
4 Loosen the two thumb screws on the right side of the back panel. The first time you loosen these screws you'll need a flathead screwdriver. (These screws do not detach; they'll stay on the side panel loosely until you tighten them again.) 6 Grasp the handle (A) with your other hand and pull the panel towards you until it stops. 5 Stand behind the computer, and place one hand on top of the chassis. 7 Lift the panel up and out. Set the panel aside.
-
 1
1 -
 2
2 -
 3
3 -
 4
4 -
 5
5 -
 6
6 -
 7
7 -
 8
8 -
 9
9 -
 10
10 -
 11
11 -
 12
12 -
13
-
14
-
15
-
16
-
17
-
18
-
19
-
20
-
21
-
22
-
23
-
24
-
25
-
26
-
27
-
28
-
29
-
30
-
31
-
32
-
33
-
34
-
35
-
36
-
37
-
38
-
39
-
40
-
41
-
42
-
43
-
44
-
45
 |
 |

4
Loosen the two thumb screws on the right
side of the back panel. The first time you
loosen these screws you’ll need a flathead
screwdriver. (These screws do not detach;
they’ll stay on the side panel loosely until
you tighten them again.)
5
Stand behind the computer, and place one
hand on top of the chassis.
6
Grasp the handle (
A
) with your other hand
and pull the panel towards you until it
stops.
7
Lift the panel up and out. Set the panel
aside.