HP Pavilion 7700 HP Pavilion Home PC - (English) Upgrading and Servicing the P - Page 22
Closing the Computer
 |
View all HP Pavilion 7700 manuals
Add to My Manuals
Save this manual to your list of manuals |
Page 22 highlights
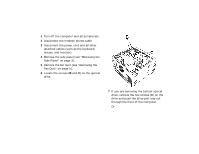
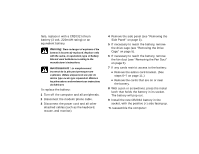
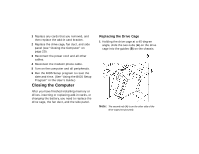
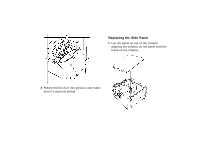
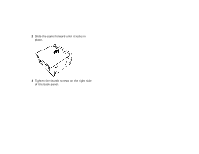
1 Replace any cards that you removed, and then replace the add-in card bracket. 2 Replace the drive cage, fan duct, and side panel (see "Closing the Computer" on page 20). 3 Reconnect the power cord and all other cables. 4 Reconnect the modem/phone cable. 5 Turn on the computer and all peripherals. 6 Run the BIOS Setup program to reset the date and time. (See "Using the BIOS Setup Program" in the User's Guide.) Closing the Computer After you have finished installing memory or drives, inserting or replacing add-in cards, or changing the battery, you need to replace the drive cage, the fan duct, and the side panel. Replacing the Drive Cage 1 Holding the drive cage at a 45-degree angle, slide the two nubs (A) on the drive cage into the guides (B) on the chassis. Note: The second nub (A) is on the other side of the drive cage (not pictured).
-
 1
1 -
2
-
3
-
4
-
5
-
6
-
7
-
8
-
9
-
10
-
11
-
12
-
13
-
14
-
15
-
16
-
 17
17 -
 18
18 -
 19
19 -
 20
20 -
 21
21 -
 22
22 -
 23
23 -
 24
24 -
 25
25 -
 26
26 -
 27
27 -
28
-
29
-
30
-
31
-
32
-
33
-
34
-
35
-
36
-
37
-
38
-
39
-
40
-
41
-
42
-
43
-
44
-
45
 |
 |
