HP Photosmart 7200 HP Photosmart 7200 series - (English) Basics Guide - Page 12
load paper in the photo cassette
 |
View all HP Photosmart 7200 manuals
Add to My Manuals
Save this manual to your list of manuals |
Page 12 highlights
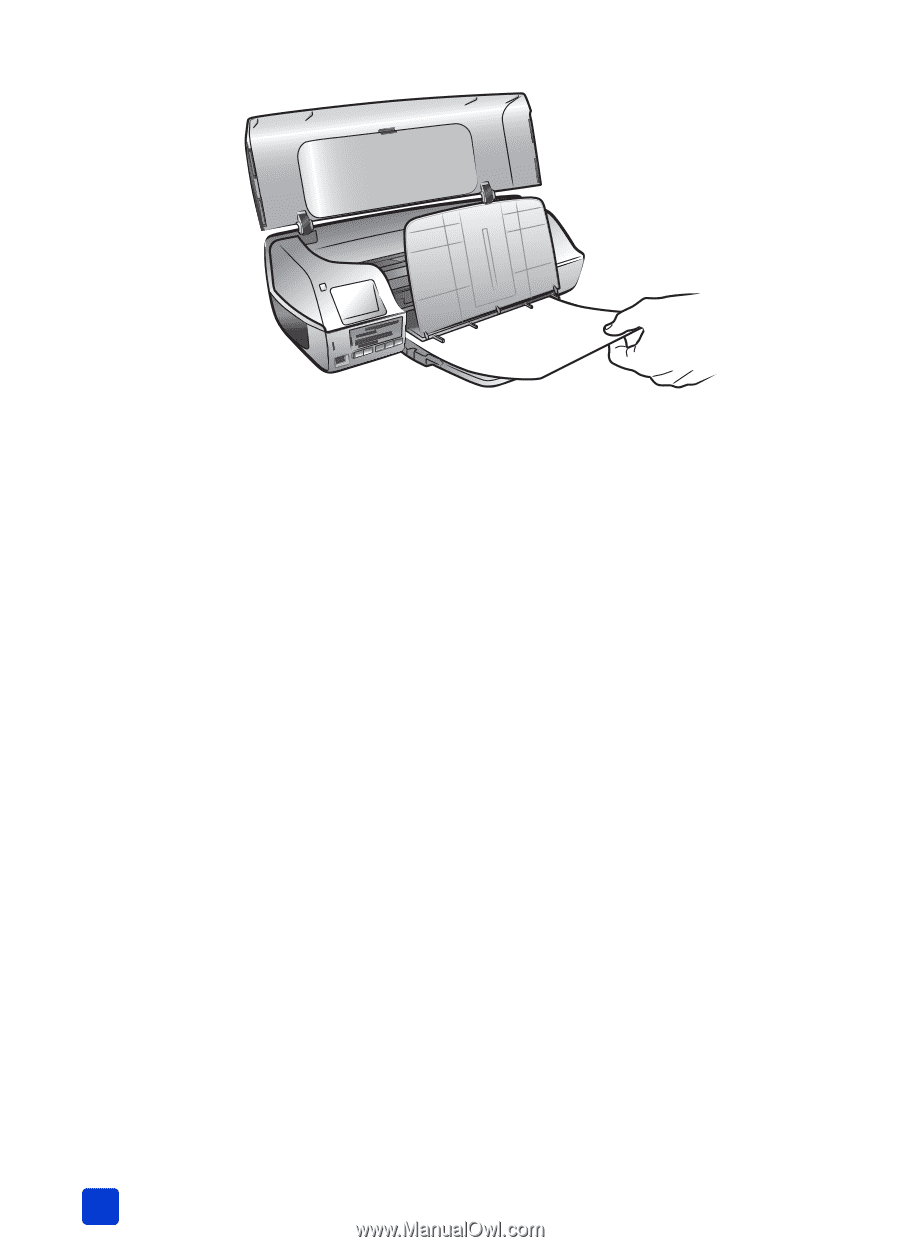
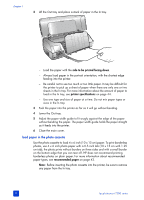
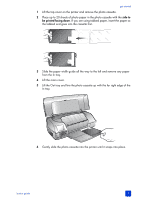
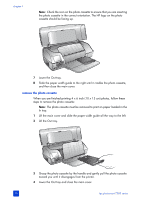
chapter 1 2 Lift the Out tray and place a stack of paper in the In tray. - Load the paper with the side to be printed facing down. - Always load paper in the portrait orientation, with the shortest edge feeding into the printer. - Be careful not to use too much or too little paper. It may be difficult for the printer to pick up a sheet of paper when there are only one or two sheets in the In tray. For more information about the amount of paper to load in the In tray, see printer specifications on page 44. - Use one type and size of paper at a time. Do not mix paper types or sizes in the In tray. 3 Push the paper into the printer as far as it will go without bending. 4 Lower the Out tray. 5 Adjust the paper width guide to fit snugly against the edge of the paper without bending the paper. The paper width guide holds the paper straight as it feeds into the printer. 6 Close the main cover. load paper in the photo cassette Use the photo cassette to load 4 x 6 inch (10 x 15 cm) paper. To print borderless photos, use 4 x 6 inch photo paper with a 0.5 inch tab (10 x 15 cm with 1.25 cm tab); the photo prints without borders on three sides and with a small border on the bottom edge that you can tear off. HP does not recommend printing borderless photos on plain paper. For more information about recommended paper types, see recommended paper on page 43. Note: Before inserting the photo cassette into the printer, be sure to remove any paper from the In tray. 8 hp photosmart 7200 series
-
 1
1 -
2
-
3
-
4
-
5
-
6
-
 7
7 -
 8
8 -
 9
9 -
 10
10 -
 11
11 -
 12
12 -
 13
13 -
 14
14 -
 15
15 -
 16
16 -
 17
17 -
18
-
19
-
20
-
21
-
22
-
23
-
24
-
25
-
26
-
27
-
28
-
29
-
30
-
31
-
32
-
33
-
34
-
35
-
36
-
37
-
38
-
39
-
40
-
41
-
42
-
43
-
44
-
45
-
46
-
47
-
48
-
49
-
50
-
51
-
52
-
53
-
54
-
55
-
56
-
57
-
58
-
59
-
60
-
61
-
62
-
63
-
64
 |
 |