HP Photosmart 7200 HP Photosmart 7200 series - (English) Basics Guide - Page 13
side to, be printed facing down
 |
View all HP Photosmart 7200 manuals
Add to My Manuals
Save this manual to your list of manuals |
Page 13 highlights
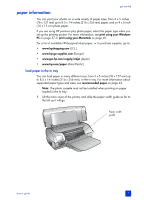
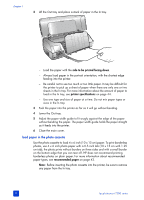
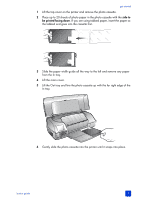
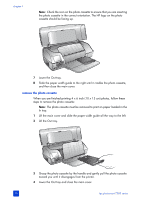
get started 1 Lift the top cover on the printer and remove the photo cassette. 2 Place up to 20 sheets of photo paper in the photo cassette with the side to be printed facing down. If you are using tabbed paper, insert the paper so the tabbed end goes into the cassette first. 3 Slide the paper width guide all the way to the left and remove any paper from the In tray. 4 Lift the main cover. 5 Lift the Out tray and line the photo cassette up with the far right edge of the In tray. 6 Gently slide the photo cassette into the printer until it snaps into place. basics guide 9
-
 1
1 -
2
-
3
-
4
-
5
-
6
-
7
-
 8
8 -
 9
9 -
 10
10 -
 11
11 -
 12
12 -
 13
13 -
 14
14 -
 15
15 -
 16
16 -
 17
17 -
 18
18 -
19
-
20
-
21
-
22
-
23
-
24
-
25
-
26
-
27
-
28
-
29
-
30
-
31
-
32
-
33
-
34
-
35
-
36
-
37
-
38
-
39
-
40
-
41
-
42
-
43
-
44
-
45
-
46
-
47
-
48
-
49
-
50
-
51
-
52
-
53
-
54
-
55
-
56
-
57
-
58
-
59
-
60
-
61
-
62
-
63
-
64
 |
 |

basics guide
get started
9
1
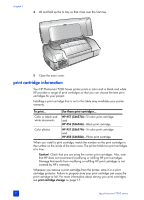
Lift the top cover on the printer and remove the photo cassette.
2
Place up to 20 sheets of photo paper in the photo cassette with the
side to
be printed facing down
. If you are using tabbed paper, insert the paper so
the tabbed end goes into the cassette first.
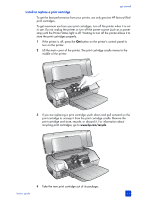
3
Slide the paper width guide all the way to the left and remove any paper
from the In tray.
4
Lift the main cover.
5
Lift the Out tray and line the photo cassette up with the far right edge of the
In tray.
6
Gently slide the photo cassette into the printer until it snaps into place.