HP Photosmart 7200 HP Photosmart 7200 series - (English) Basics Guide - Page 20
remove the print cartridge
 |
View all HP Photosmart 7200 manuals
Add to My Manuals
Save this manual to your list of manuals |
Page 20 highlights
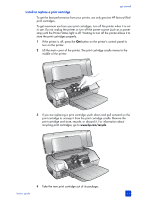
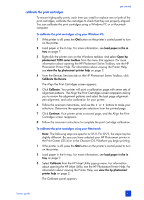
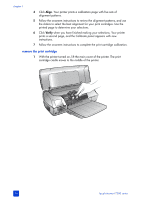
chapter 1 4 Click Align. Your printer prints a calibration page with five sets of alignment patterns. 5 Follow the onscreen instructions to review the alignment patterns, and use the sliders to select the best alignment for your print cartridges. Use the printed page to determine your selections. 6 Click Verify when you have finished making your selections. Your printer prints a second page, and the Calibrate panel appears with new instructions. 7 Follow the onscreen instructions to complete the print cartridge calibration. remove the print cartridge 1 With the printer turned on, lift the main cover of the printer. The print cartridge cradle moves to the middle of the printer. 16 hp photosmart 7200 series
-
 1
1 -
2
-
3
-
4
-
5
-
6
-
7
-
8
-
9
-
10
-
11
-
12
-
13
-
14
-
 15
15 -
 16
16 -
 17
17 -
 18
18 -
 19
19 -
 20
20 -
 21
21 -
 22
22 -
 23
23 -
 24
24 -
 25
25 -
26
-
27
-
28
-
29
-
30
-
31
-
32
-
33
-
34
-
35
-
36
-
37
-
38
-
39
-
40
-
41
-
42
-
43
-
44
-
45
-
46
-
47
-
48
-
49
-
50
-
51
-
52
-
53
-
54
-
55
-
56
-
57
-
58
-
59
-
60
-
61
-
62
-
63
-
64
 |
 |

hp photosmart 7200 series
chapter 1
16
4
Click
Align
. Your printer prints a calibration page with five sets of
alignment patterns.
5
Follow the onscreen instructions to review the alignment patterns, and use
the sliders to select the best alignment for your print cartridges. Use the
printed page to determine your selections.
6
Click
Verify
when you have finished making your selections. Your printer
prints a second page, and the Calibrate panel appears with new
instructions.
7
Follow the onscreen instructions to complete the print cartridge calibration.
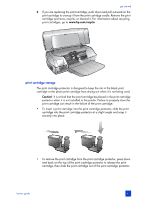
remove the print cartridge
1
With the printer turned on, lift the main cover of the printer. The print
cartridge cradle moves to the middle of the printer.