HP Photosmart 7200 HP Photosmart 7200 series - (English) Basics Guide - Page 18
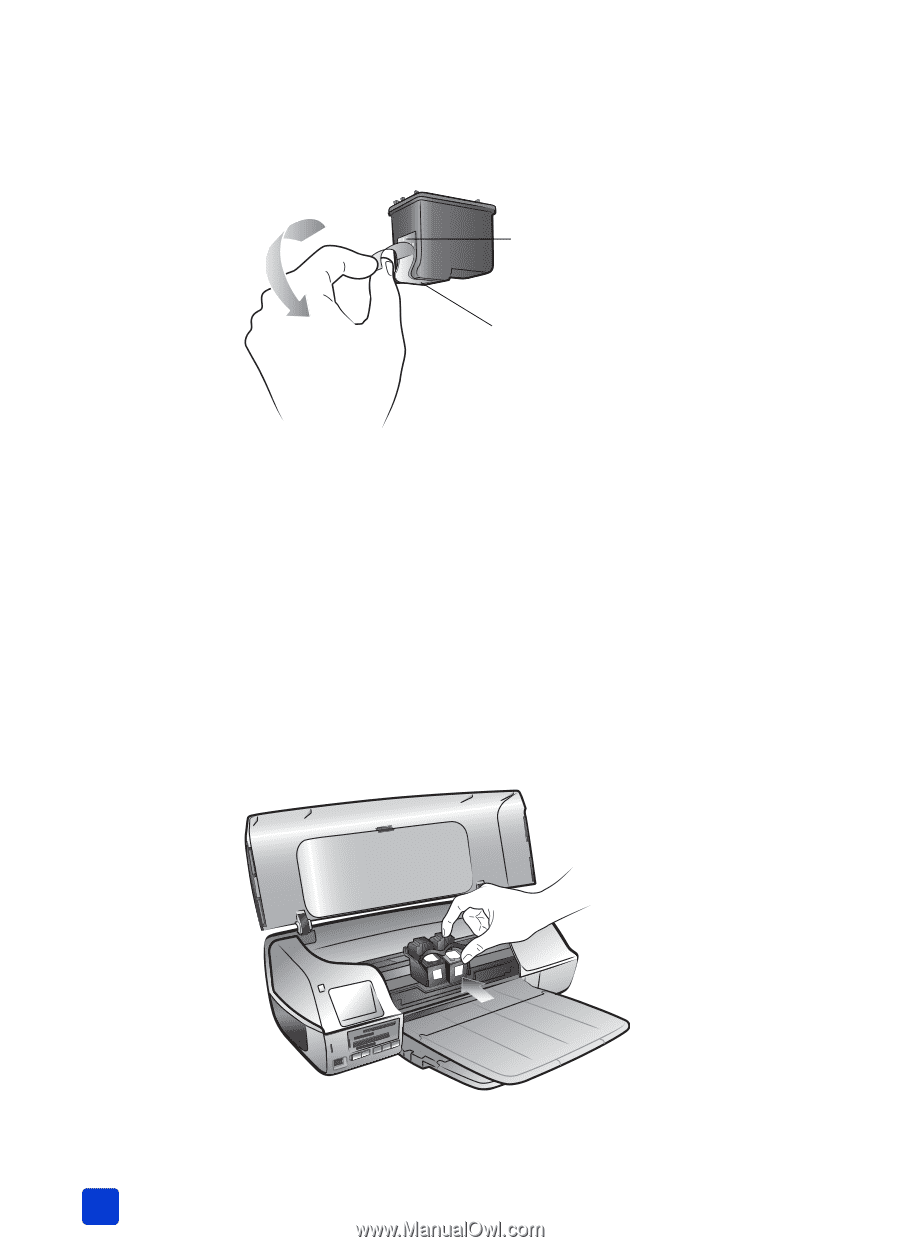
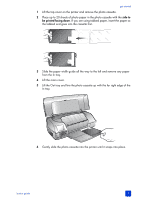
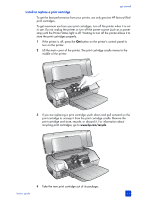
top of the print cartridge with the grooves on the inside of the print - ink
 |
View all HP Photosmart 7200 manuals
Add to My Manuals
Save this manual to your list of manuals |
Page 18 highlights
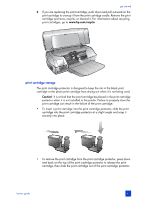
chapter 1 5 Grasp the pink tab and gently peel off the clear plastic tape. Make sure you remove only the clear tape. Be sure to install the print cartridge immediately after removing the tape; ink nozzles exposed longer than one minute may dry out and cause printing problems later. Once the tape is removed, do not attempt to replace it. Copper contacts Ink nozzles Caution! Do not touch the ink nozzles or the copper contacts on the print cartridge. Touching these parts may cause the print cartridge to fail. 6 Insert the print cartridge: Note: The tri-color print cartridge must be installed in the left stall of the print cartridge cradle. The black or the photo print cartridge must be installed in the right stall of the print cartridge cradle. a. Hold the print cartridge so the copper contacts go into the print cartridge cradle first. Line up the ridges on the left and right sides of the top of the print cartridge with the grooves on the inside of the print cartridge cradle. The label on the print cartridge should face upwards. a. Carefully slide the print cartridge into the print cartridge cradle at a slight angle, then firmly push the print cartridge in until it snaps into place. 7 Repeat steps 3-6 to install the second print cartridge. 8 Close the main cover. 14 hp photosmart 7200 series
-
 1
1 -
2
-
3
-
4
-
5
-
6
-
7
-
8
-
9
-
10
-
11
-
12
-
 13
13 -
 14
14 -
 15
15 -
 16
16 -
 17
17 -
 18
18 -
 19
19 -
 20
20 -
 21
21 -
 22
22 -
 23
23 -
24
-
25
-
26
-
27
-
28
-
29
-
30
-
31
-
32
-
33
-
34
-
35
-
36
-
37
-
38
-
39
-
40
-
41
-
42
-
43
-
44
-
45
-
46
-
47
-
48
-
49
-
50
-
51
-
52
-
53
-
54
-
55
-
56
-
57
-
58
-
59
-
60
-
61
-
62
-
63
-
64
 |
 |