HP Photosmart 7200 HP Photosmart 7200 series - (English) Basics Guide - Page 39
Properties, Preferences, Setup, Format for, photosmart 7200 series, Paper, Print
 |
View all HP Photosmart 7200 manuals
Add to My Manuals
Save this manual to your list of manuals |
Page 39 highlights
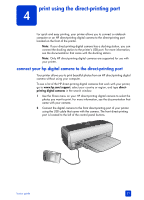
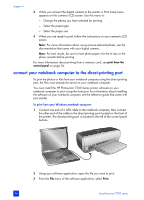
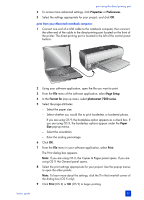
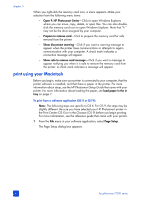
print using the direct-printing port 4 To access more advanced settings, click Properties or Preferences. 5 Select the settings appropriate for your project, and click OK. print from your Macintosh notebook computer: 1 Connect one end of a USB cable to the notebook computer, then connect the other end of the cable to the direct-printing port located on the front of the printer. The direct-printing port is located to the left of the control panel buttons. 2 Using your software application, open the file you want to print. 3 From the File menu of the software application, select Page Setup. 4 In the Format for pop-up menu, select photosmart 7200 series. 5 Select the page attributes: - Select the paper size. - Select whether you would like to print borderless or bordered photos. If you are using OS 9, the borderless option appears as a check box. If you are using OS X, the borderless options appear under the Paper Size pop-up menus. - Select the orientation. - Enter the scaling percentage. 6 Click OK. 7 From the File menu in your software application, select Print. The Print dialog box appears. Note: If you are using OS X, the Copies & Pages panel opens. If you are using OS 9, the General panel opens. 8 Select the print settings appropriate for your project. Use the pop-up menus to open the other panels. Note: To learn more about the settings, click the ? in the lower-left corner of the dialog box (OS X only). 9 Click Print (OS X) or OK (OS 9) to begin printing. basics guide 35
-
 1
1 -
2
-
3
-
4
-
5
-
6
-
7
-
8
-
9
-
10
-
11
-
12
-
13
-
14
-
15
-
16
-
17
-
18
-
19
-
20
-
21
-
22
-
23
-
24
-
25
-
26
-
27
-
28
-
29
-
30
-
31
-
32
-
33
-
 34
34 -
 35
35 -
 36
36 -
 37
37 -
 38
38 -
 39
39 -
 40
40 -
 41
41 -
 42
42 -
 43
43 -
 44
44 -
45
-
46
-
47
-
48
-
49
-
50
-
51
-
52
-
53
-
54
-
55
-
56
-
57
-
58
-
59
-
60
-
61
-
62
-
63
-
64
 |
 |
