HP ProLiant DL320e HP Intelligent Provisioning User Guide - Page 17
Additional information required for customized installations
 |
View all HP ProLiant DL320e manuals
Add to My Manuals
Save this manual to your list of manuals |
Page 17 highlights
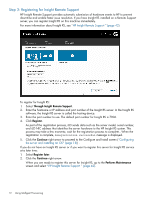
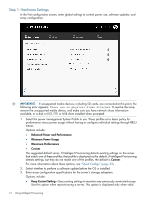
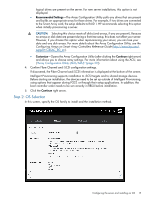
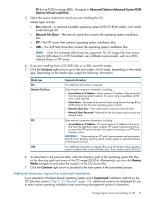
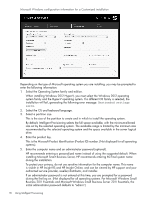
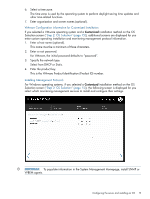
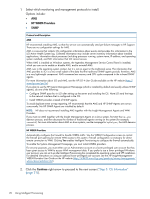
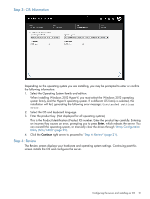
F9 during POST to access RBSU. Navigate to Advanced Options>Advanced System ROM Options>Virtual install Disk. 3. Select the source media from which you are installing the OS. Media types include: • Disc (default)-A standard bootable operating system DVD/CD-ROM media, and virtual media through iLO • Network File Share-The network share that contains the operating system installation files • FTP-The FTP server that contains operating system installation files • USB- The USB flash drive that contains the operating system installation files NOTE: Only FAT formatted USB drives are supported. For OS image files that cannot copy to USB unless it is NTFS formatted, use a different source media, such as a DVD, network share, or FTP server. 4. If you are installing from a CD/DVD disk or a USB, insert the media. 5. Click the Continue right arrow to go to the next screen, which varies, depending on the media type. Depending on the media type, supply the following information: Media type Disc Network File Share FTP USB Required information No additional information is required. Enter network connection information, including: • Server Name or IP Address-Server name or IP address of the server that hosts the operating system contents. If a server name is specified, a DNS entry is also required. • Share Name-The name of the network share using Server Message Block (SMB) protocol that hosts the operating system contents. • Network Share User-User name used to access the network share. • Network Share Password-Password for the user name used to access the network share. Enter network connection information, including: • Server Name or IP Address-FTP server name or IP address of the server that hosts the operating system contents. FTP support requires anonymous access to the FTP server and does not support connecting to an FTP server through a proxy. IMPORTANT: When entering an FTP path, remove spaces and punctuation. The FTP server directory structure cannot contain spaces or special characters (including punctuation). No additional information is required. Browse to the location of the operating system installation files on the USB flash drive. Then, double-click the ISO file. 6. As described in the previous table, enter the directory path of the operating system flat files, or the directory path and name of the CD image (ISO) file. Alternatively, you can click Browse Media navigate to and select the location of the OS source files. 7. Click the Continue right arrow to proceed to the next screen in the automated process. Additional information required for customized installations If you selected a Windows-based operating system and a Customized installation method on the OS Selection screen ("Step 2: OS Selection" (page 15)), additional screens are displayed for you to enter custom operating installation and monitoring management protocol information. Configuring the server and installing an OS 17
-
 1
1 -
2
-
3
-
4
-
5
-
6
-
7
-
8
-
9
-
10
-
11
-
 12
12 -
 13
13 -
 14
14 -
 15
15 -
 16
16 -
 17
17 -
 18
18 -
 19
19 -
 20
20 -
 21
21 -
 22
22 -
23
-
24
-
25
-
26
-
27
-
28
-
29
-
30
-
31
-
32
-
33
-
34
-
35
-
36
-
37
-
38
-
39
-
40
-
41
-
42
-
43
-
44
-
45
-
46
-
47
-
48
-
49
-
50
-
51
-
52
-
53
-
54
-
55
-
56
 |
 |
