HP ProLiant DL360e HP Smart Update Firmware DVD User Guide - Page 11
Deploying components online, Deploying offline, Using the HP USB Key Utility
 |
View all HP ProLiant DL360e manuals
Add to My Manuals
Save this manual to your list of manuals |
Page 11 highlights
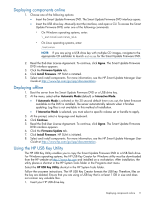
Deploying components online 1. Choose one of the following options: • Insert the Smart Update Firmware DVD. The Smart Update Firmware DVD interface opens. • Insert the USB drive key. Manually start the interface, and open a CLI. To access the Smart Update Firmware DVD, enter one of the following commands: ◦ On Windows operating systems, enter: \_autorun\autorun_win ◦ On Linux operating systems, enter: /autorun NOTE: If you are using a USB drive key with multiple CD images, navigate to the appropriate CD subfolder to launch autorun for the Smart Update Firmware DVD. 2. Read the End-User License Agreement. To continue, click Agree. The Smart Update Firmware DVD interface appears. 3. Click the Firmware Update tab. 4. Click Install Firmware. HP SUM is initiated. 5. Select and install components. For more information, see the HP Smart Update Manager User Guide at http://www.hp.com/go/spp/documentation. Deploying offline 1. Boot the server from the Smart Update Firmware DVD or a USB drive key. 2. At the menu, select either Automatic Mode (default) or Interactive Mode. • If Automatic Mode is selected or the 30 second default timer runs out, the latest firmware available on the DVD is installed. The server automatically reboots when it finishes updating. Log files is not available in this method of installation. • If Interactive Mode is selected, you must select a specific release set or bundle to apply. 3. At the prompt, select a language and keyboard. 4. Click Continue. 5. Read the End-User License Agreement. To continue, click Agree. The Smart Update Firmware DVD interface appears. 6. Click the Firmware Update tab. 7. Click Install Firmware. HP SUM is initiated. 8. Select and install components. For more information, see the HP Smart Update Manager User Guide at http://www.hp.com/go/spp/documentation. Using the HP USB Key Utility The HP USB Key Utility enables you to copy the Smart Update Firmware DVD to a USB flash drive. For Windows operating systems, the HP USB Key Creator for Windows utility must be downloaded from the HP website at http://www.hp.com and installed on a workstation. After installation, the utility places a shortcut in the HP System Tools folder in the Programs start menu. Select the HP USB Key Utility shortcut in the HP System Tools folder. Follow the onscreen instructions. The HP USB Key Creator formats the USB key. Therefore, files on the key are deleted. Ensure that you are using a USB key that is at least 1 GB in size and does not contain any valuable files. 1. Insert your HP USB drive key. Deploying components online 11
-
 1
1 -
2
-
3
-
4
-
5
-
 6
6 -
 7
7 -
 8
8 -
 9
9 -
 10
10 -
 11
11 -
 12
12 -
 13
13 -
 14
14 -
 15
15 -
 16
16 -
17
-
18
-
19
-
20
-
21
-
22
-
23
-
24
-
25
-
26
-
27
-
28
-
29
-
30
-
31
-
32
-
33
-
34
-
35
-
36
-
37
-
38
-
39
-
40
-
41
-
42
-
43
-
44
-
45
-
46
-
47
 |
 |
