HP Rp5700 Hardware Reference Guide - HP rp5700 - Page 29
Installing and Removing a PCI Card in the Riser Card, CAUTION, - power supply
 |
UPC - 884420470731
View all HP Rp5700 manuals
Add to My Manuals
Save this manual to your list of manuals |
Page 29 highlights
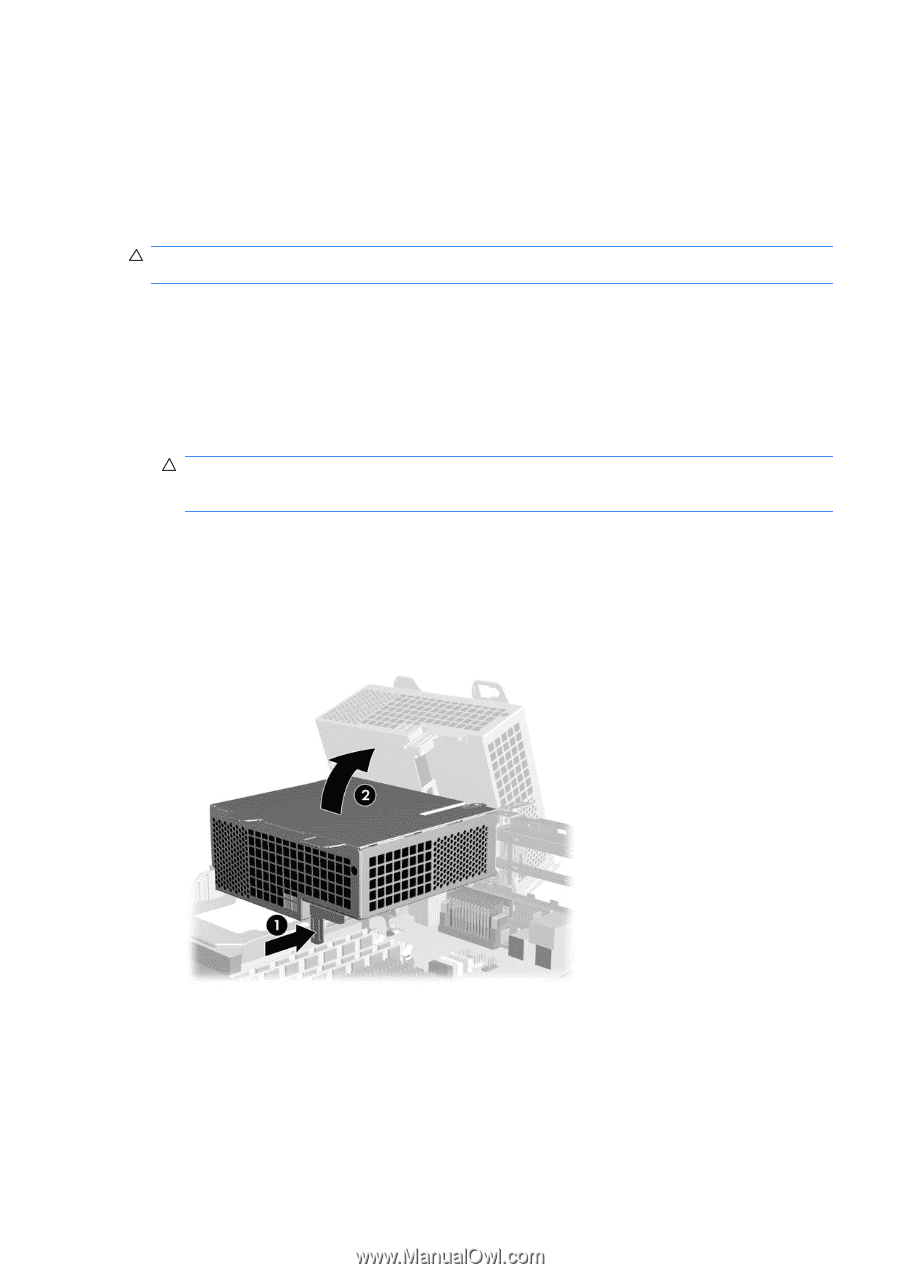
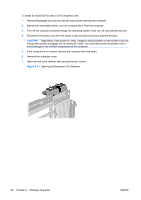
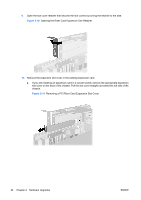
16. Lock any security devices that were disengaged when the computer cover was removed. 17. Reconfigure the computer, if necessary. Refer to the Computer Setup (F10) Utility Guide on the Documentation and Diagnostics CD for instructions about using Computer Setup. Installing and Removing a PCI Card in the Riser Card You can install two full-height PCI cards in the riser card. CAUTION: To avoid damage to the riser card or installed PCI expansion cards, be sure to remove all installed PCI expansion cards before attempting to remove the riser card from the chassis. To install a PCI card in the riser: 1. Remove/disengage any security devices that prohibit opening the computer. 2. Remove all removable media, such as compact discs, from the computer. 3. Turn off the computer properly through the operating system, then turn off any external devices. 4. Disconnect the power cord from the power outlet and disconnect any external devices. CAUTION: Regardless of the power-on state, voltage is always present on the system board as long as the system is plugged into an active AC outlet. You must disconnect the power cord to avoid damage to the internal components of the computer. 5. If the computer is on a stand, remove the computer from the stand. 6. Remove the computer cover. 7. Press the latch release on the front of the power supply (1), and then raise the power supply to the upright position (2). Figure 2-17 Releasing and Rotating the Power Supply 8. Locate the correct vacant expansion socket in the PC riser and the corresponding expansion slot on the back of the computer chassis. ENWW Removing or Installing an Expansion Card 23
-
 1
1 -
2
-
3
-
4
-
5
-
6
-
7
-
8
-
9
-
10
-
11
-
12
-
13
-
14
-
15
-
16
-
17
-
18
-
19
-
20
-
21
-
22
-
23
-
 24
24 -
 25
25 -
 26
26 -
 27
27 -
 28
28 -
 29
29 -
 30
30 -
 31
31 -
 32
32 -
 33
33 -
 34
34 -
35
-
36
-
37
-
38
-
39
-
40
-
41
-
42
-
43
-
44
-
45
-
46
-
47
-
48
-
49
-
50
-
51
-
52
-
53
-
54
-
55
-
56
-
57
-
58
-
59
-
60
-
61
-
62
-
63
-
64
-
65
-
66
-
67
-
68
 |
 |