HP XM600 hp kayak xm600 series 2, user's guide for minitower models - Page 25
Removing the Front Bezel, Replacing the Cover and Front Bezel, right-hand side of the chassis
 |
View all HP XM600 manuals
Add to My Manuals
Save this manual to your list of manuals |
Page 25 highlights
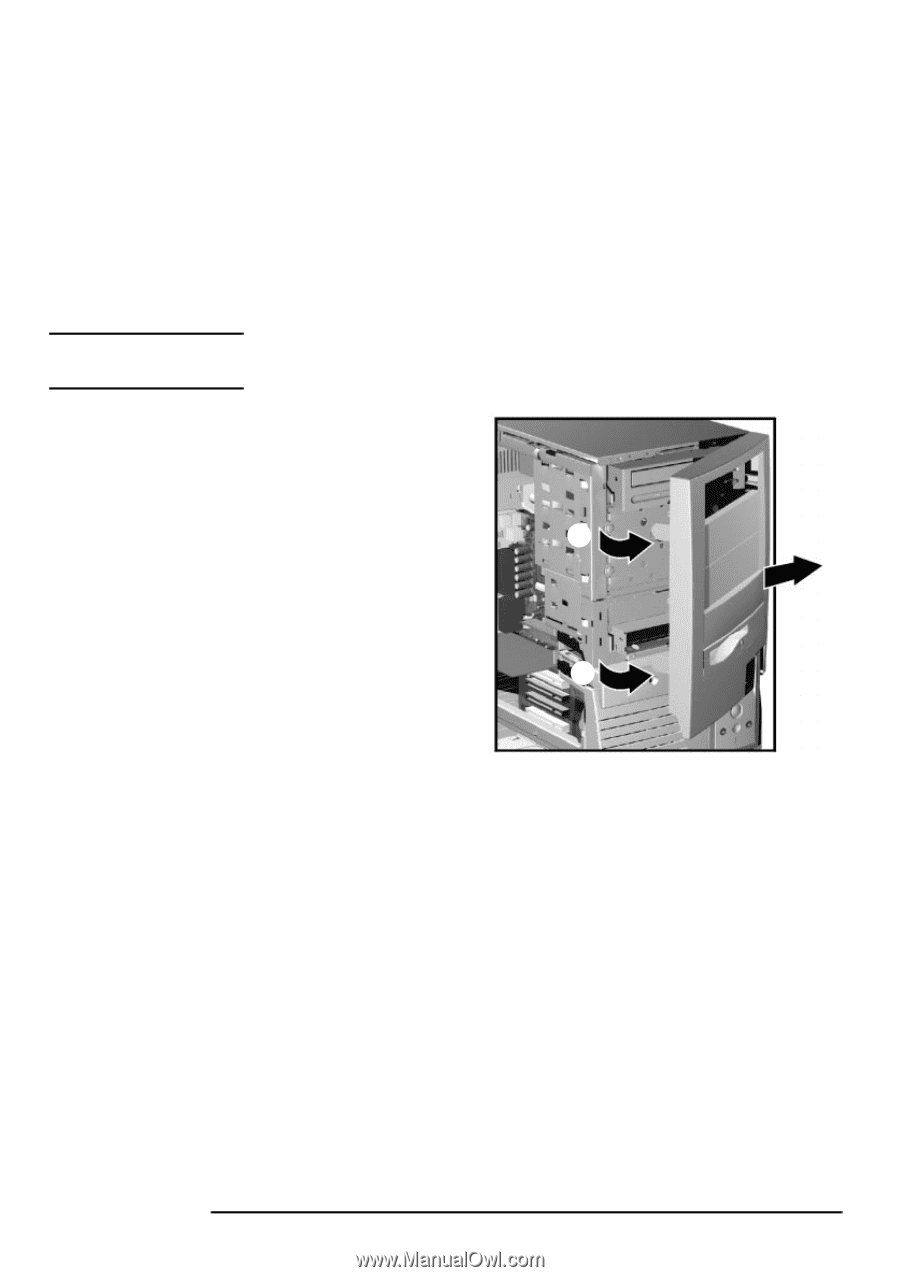
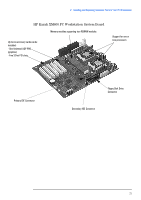
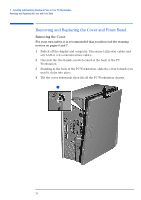
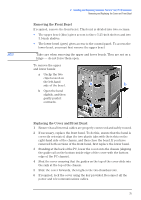
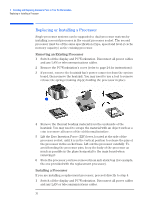
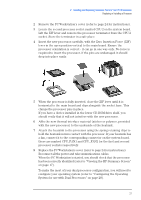
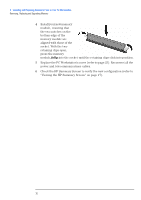
NOTE 2 Installing and Replacing Hardware Parts in Your PC Workstation Removing and Replacing the Cover and Front Bezel Removing the Front Bezel If required, remove the front bezel. This bezel is divided into two sections: • The upper bezel (blue) gives access to three 5.25-inch shelves and two 3.5-inch shelves. • The lower bezel (grey) gives access to the control panel. To access the lower bezel, you must first remove the upper bezel. Take care when removing the upper and lower bezels. They are not on a hinge - do not force them open. To remove the upper and lower bezels: a Unclip the two clips located on the left-hand side of the bezel. a b b Open the bezel slightly, and then gently push it outwards. a Replacing the Cover and Front Bezel 1 Ensure that all internal cables are properly connected and safely routed. 2 If necessary, replace the front bezel. To do this, ensure that the bezel is correctly orientated, align the two plastic tabs with their slots on the right-hand side of the chassis, and then close the bezel. If you have removed both sections of the front bezel, first replace the lower bezel. 3 Standing at the back of the PC, lower the cover onto the chassis (aligning the guide rail on the bottom inside edge of the cover with the bottom edge of the PC chassis). 4 Shut the cover ensuring that the guides on the top of the cover slide into the rails at the top of the chassis. 5 Slide the cover forwards, then tighten the two thumbscrews. 6 If required, lock the cover using the key provided. Reconnect all the power and telecommunications cables. 25
-
 1
1 -
2
-
3
-
4
-
5
-
6
-
7
-
8
-
9
-
10
-
11
-
12
-
13
-
14
-
15
-
16
-
17
-
18
-
19
-
 20
20 -
 21
21 -
 22
22 -
 23
23 -
 24
24 -
 25
25 -
 26
26 -
 27
27 -
 28
28 -
 29
29 -
 30
30 -
31
-
32
-
33
-
34
-
35
-
36
-
37
-
38
-
39
-
40
-
41
-
42
-
43
-
44
-
45
-
46
-
47
-
48
-
49
-
50
-
51
-
52
-
53
-
54
-
55
-
56
-
57
-
58
-
59
-
60
-
61
-
62
-
63
-
64
-
65
-
66
-
67
-
68
-
69
-
70
 |
 |