HP XM600 hp kayak xm600 series 2, user's guide for minitower models - Page 37
Installing a Second Hard Disk Drive in an Internal Shelf, Installing the, New Drive
 |
View all HP XM600 manuals
Add to My Manuals
Save this manual to your list of manuals |
Page 37 highlights
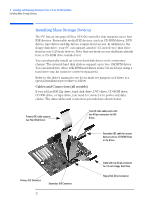
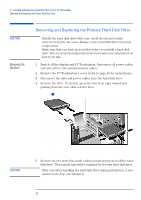
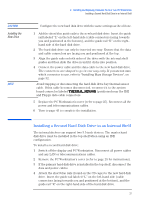
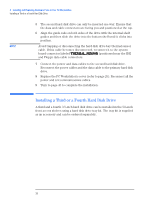
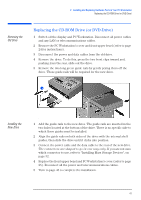
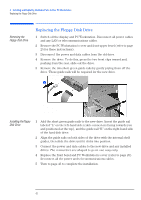
CAUTION Installing the New Drive NOTE 2 Installing and Replacing Hardware Parts in Your PC Workstation Installing a Second Hard Disk Drive in an Internal Shelf Configure the new hard disk drive with the same settings as the old one. 1 Add the short blue guide rails to the new hard disk drive. Insert the guide rail labeled "L" on the left-hand side (cable connectors facing towards you and positioned at the bottom), and the guide rail "R" on the righthand side of the hard disk drive. 2 The hard disk drive can only be inserted one way. Ensure that the data and cable connectors are facing you and positioned at the top. 3 Align the guide rails on both sides of the drive with the internal shelf guides and then slide the drive in until it clicks into position. 4 Connect the power cable and the data cable to the new hard disk drive. The connectors are shaped to go in one way only. If you are not sure which connector to use, refer to "Installing Mass Storage Devices", on page 32. Avoid trapping or disconnecting the hard disk drive bay thermal sensor cable. If this cable becomes disconnected, reconnect it to the system board connector labeled THERMAL_SENSOR (positioned near the IDE and Floppy data cable connectors. 5 Replace the PC Workstation's cover (refer to page 25). Reconnect all the power and telecommunications cables. 6 Turn to page 43 to complete the installation. Installing a Second Hard Disk Drive in an Internal Shelf The internal shelves can support two 3.5-inch devices. The master hard disk drive must be installed in the top shelf when using an IDE configuration. To install a second hard disk drive: 1 Switch off the display and PC Workstation. Disconnect all power cables and any LAN or telecommunications cables. 2 Remove the PC Workstation's cover (refer to page 25 for instructions). 3 If the primary hard disk drive is installed in the top shelf, disconnect the data and power cables. 4 Attach the short blue rails (found on the CD cage) to the new hard disk drive. Insert the guide rail labeled "L" on the left-hand side (cable connectors facing towards you and positioned at the bottom), and the guide rail "R" on the right-hand side of the hard disk drive. 37
-
 1
1 -
2
-
3
-
4
-
5
-
6
-
7
-
8
-
9
-
10
-
11
-
12
-
13
-
14
-
15
-
16
-
17
-
18
-
19
-
20
-
21
-
22
-
23
-
24
-
25
-
26
-
27
-
28
-
29
-
30
-
31
-
 32
32 -
 33
33 -
 34
34 -
 35
35 -
 36
36 -
 37
37 -
 38
38 -
 39
39 -
 40
40 -
 41
41 -
 42
42 -
43
-
44
-
45
-
46
-
47
-
48
-
49
-
50
-
51
-
52
-
53
-
54
-
55
-
56
-
57
-
58
-
59
-
60
-
61
-
62
-
63
-
64
-
65
-
66
-
67
-
68
-
69
-
70
 |
 |