HP Xw460c Hardware and Software Supported by HP ProLiant Blade Workstations - - Page 25
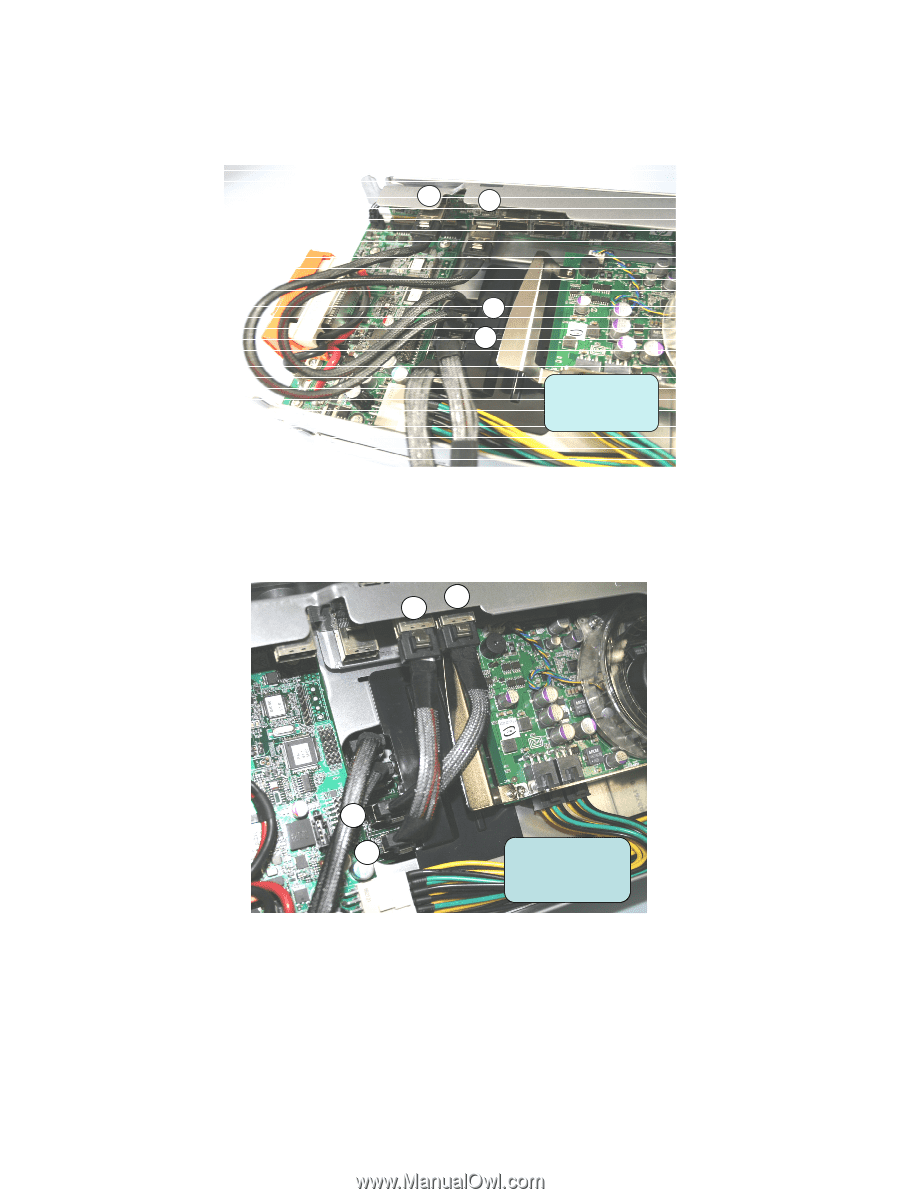
Long cables, disconnected for, clarity,
 |
View all HP Xw460c manuals
Add to My Manuals
Save this manual to your list of manuals |
Page 25 highlights
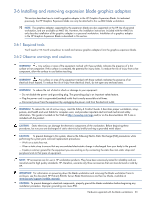
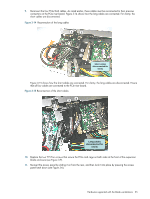
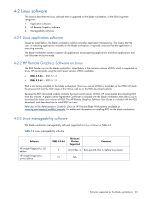
9. Reconnect the four PCIe/SAS cables. As noted earlier, these cables must be reconnected to their previous connectors on the PCIe riser board. Figure 3-14 shows how the long cables are connected. For clarity, the short cables are disconnected. Figure 3-14 Reconnection of the long cables 1 2 2 1 Short cables disconnected for clarity Figure 3-15 shows how the short cables are connected. For clarity, the long cables are disconnected. Ensure that all four cables are connected to the PCIe riser board. Figure 3-15 Reconnection of the short cables 34 4 3 Long cables disconnected for clarity 10. Replace the two T15 Torx screws that secure the PCIe card cage on both sides at the front of the expansion blade enclosure (see Figure 3-9). 11. Re-insert the access panel by sliding it on from the rear, and then lock it into place by pressing the access panel latch down (see Figure 3-6). Hardware supported with the blade workstations 25
-
 1
1 -
2
-
3
-
4
-
5
-
6
-
7
-
8
-
9
-
10
-
11
-
12
-
13
-
14
-
15
-
16
-
17
-
18
-
19
-
 20
20 -
 21
21 -
 22
22 -
 23
23 -
 24
24 -
 25
25 -
 26
26 -
 27
27 -
 28
28 -
 29
29 -
 30
30 -
31
-
32
-
33
-
34
-
35
 |
 |