HP dc73 Altiris Deployment Solution Guide for Workstation Clients using Embedd - Page 33
Example installation from the USB key, see A-8. Upgrade allows the OS
 |
View all HP dc73 manuals
Add to My Manuals
Save this manual to your list of manuals |
Page 33 highlights
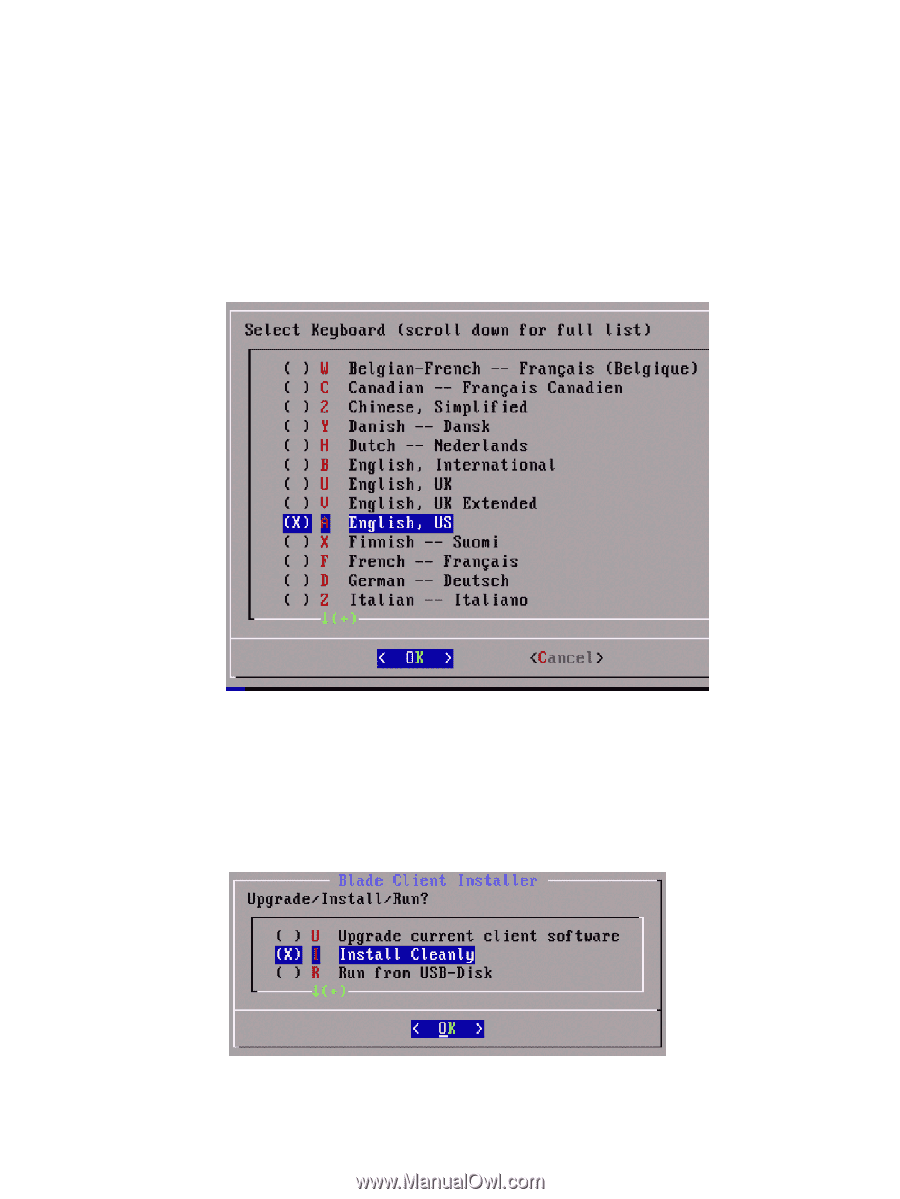
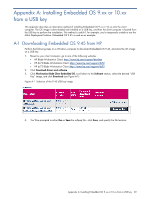
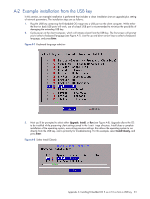
A-2 Example installation from the USB key In this section, an example installation is performed that includes a clean installation (not an upgrade) plus setting of network parameters. The installation steps are as follows: 1. Plug the USB key containing the Embedded OS image into a USB port on the client computer. While either the front or back USB ports will work, use of a back USB port is recommended to minimize the possibility of damaging the extending USB key. 2. Cycle power on the client computer, which will initiate a boot from the USB key. The first screen will prompt you to select a keyboard language (see Figure A-7). Use the up and down arrow keys to select a keyboard language, and press Enter. Figure A-7 Keyboard language selection 3. Next you'll be prompted to select either Upgrade, Install, or Run (see Figure A-8). Upgrade allows the OS to be installed while preserving client settings saved in the /settings directory. Install does a complete installation of the operating system, overwriting previous settings. Run allows the operating system to run directly from the USB key, and is primarily for troubleshooting. For this example, select Install Cleanly, and press Enter. Figure A-8 Select Install Cleanly Appendix A: Installing Embedded OS 9.xx or 10.xx from a USB key 33
-
 1
1 -
2
-
3
-
4
-
5
-
6
-
7
-
8
-
9
-
10
-
11
-
12
-
13
-
14
-
15
-
16
-
17
-
18
-
19
-
20
-
21
-
22
-
23
-
24
-
25
-
26
-
27
-
 28
28 -
 29
29 -
 30
30 -
 31
31 -
 32
32 -
 33
33 -
 34
34 -
 35
35 -
 36
36
 |
 |