HP dx2700 Service Reference Guide: HP Compaq dx2700 MT/dx2708 MT/dx2700 SFF Bu - Page 47
recommended that you will install a DIMM
 |
View all HP dx2700 manuals
Add to My Manuals
Save this manual to your list of manuals |
Page 47 highlights
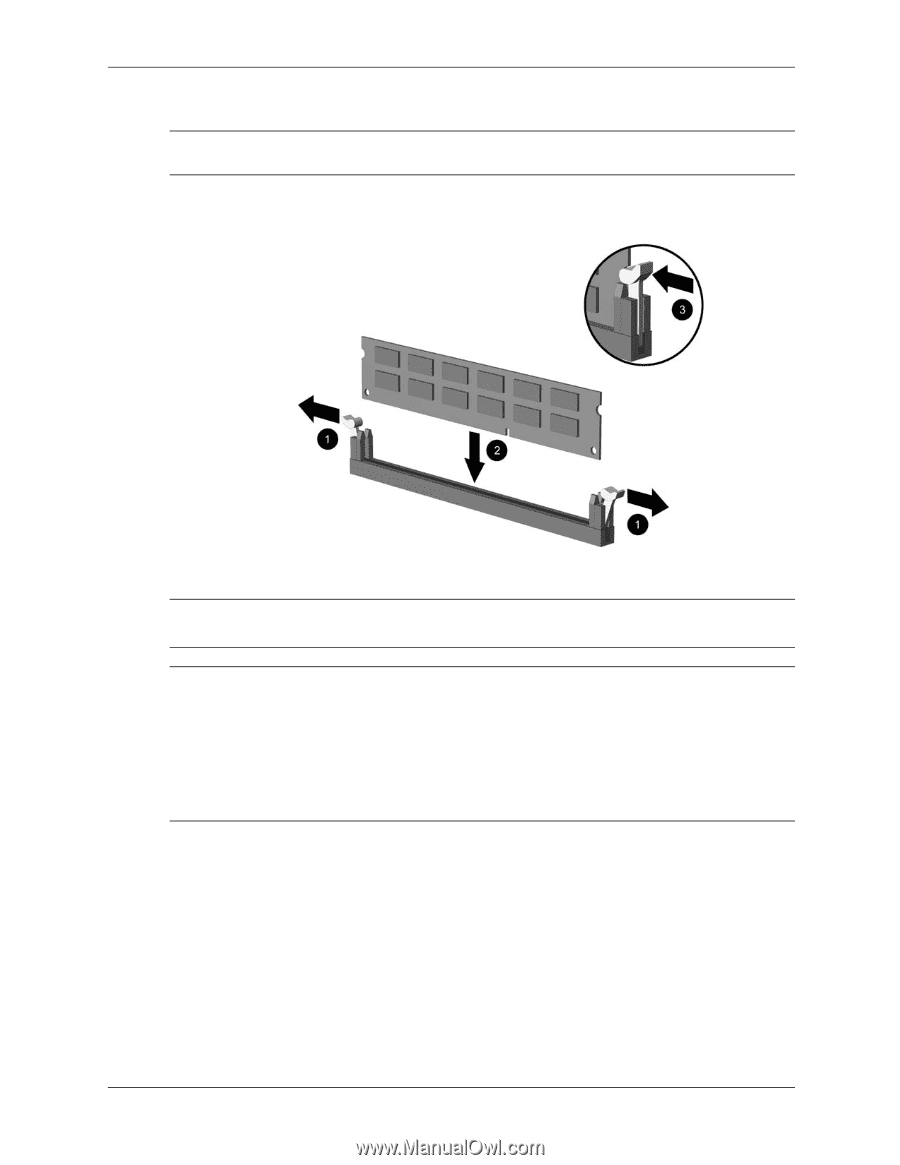
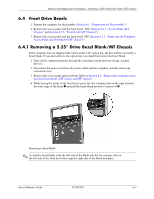
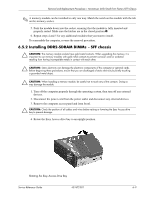
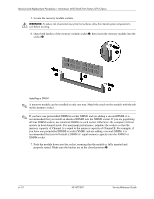
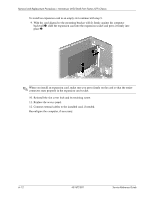
Removal and Replacement Procedures- Microtower (MT)/Small Form Factor (SFF) Chassis 5. Locate the memory module sockets. Å WARNING: To reduce risk of personal injury from hot surfaces, allow the internal system components to cool before touching. 6. Open both latches of the memory module socket 1, then insert the memory module into the socket 2. Installing a DIMM ✎ A memory module can be installed in only one way. Match the notch on the module with the tab on the memory socket. ✎ If you have one preinstalled DIMM in socket XMM1 and are adding a second DIMM, it is recommended that you install an identical DIMM into the XMM2 socket. If you are populating all four DIMM sockets, use identical DIMMs in each socket. Otherwise, the computer will not operate in dual channel mode. For maximum performance, populate the sockets so that the memory capacity of Channel A is equal to the memory capacity of Channel B. For example, if you have one preinstalled DIMM in socket XMM1 and are adding a second DIMM, it is recommended that you will install a DIMM of equal memory capacity into the XMM3 or XMM4 socket. 7. Push the module down into the socket, ensuring that the module is fully inserted and properly seated. Make sure the latches are in the closed position 3. 6-10 431672-001 Service Reference Guide
-
 1
1 -
2
-
3
-
4
-
5
-
6
-
7
-
8
-
9
-
10
-
11
-
12
-
13
-
14
-
15
-
16
-
17
-
18
-
19
-
20
-
21
-
22
-
23
-
24
-
25
-
26
-
27
-
28
-
29
-
30
-
31
-
32
-
33
-
34
-
35
-
36
-
37
-
38
-
39
-
40
-
41
-
 42
42 -
 43
43 -
 44
44 -
 45
45 -
 46
46 -
 47
47 -
 48
48 -
 49
49 -
 50
50 -
 51
51 -
 52
52 -
53
-
54
-
55
-
56
-
57
-
58
-
59
-
60
-
61
-
62
-
63
-
64
-
65
-
66
-
67
-
68
-
69
-
70
-
71
-
72
-
73
-
74
-
75
-
76
-
77
-
78
-
79
-
80
-
81
-
82
-
83
-
84
-
85
-
86
-
87
-
88
-
89
-
90
-
91
-
92
-
93
-
94
-
95
-
96
-
97
-
98
-
99
-
100
-
101
-
102
-
103
-
104
-
105
-
106
-
107
 |
 |