HP dx2700 Service Reference Guide: HP Compaq dx2700 MT/dx2708 MT/dx2700 SFF Bu - Page 57
Removing an Optical Drive or Diskette Drive - SFF chassis, Computer Setup. Refer to
 |
View all HP dx2700 manuals
Add to My Manuals
Save this manual to your list of manuals |
Page 57 highlights
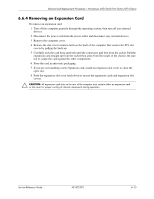
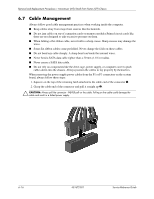
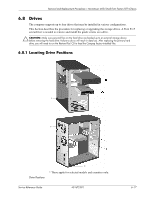
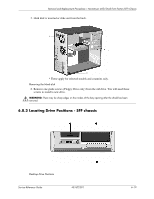
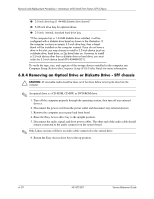
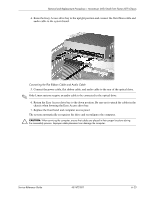
Removal and Replacement Procedures- Microtower (MT)/Small Form Factor (SFF) Chassis 1 3.5-inch drive bay (1.44-MB diskette drive shown)* 2 5.25-inch drive bay for optional drives 3 3.5-inch, internal, standard hard drive bay *If the computer has a 1.44-MB diskette drive installed, it will be configured with a diskette drive bezel as shown in the illustration. If the computer contains an empty 3.5-inch drive bay, then a bezel blank will be installed on the computer instead. If you do not have a drive in this slot, you may choose to install a 3.5-inch device (such as a diskette drive, hard drive, or Zip drive) later on. However, to install a 3.5-inch device other than a diskette drive or hard drive, you must order the 3.5-inch device bezel (PN 434484-001). To verify the type, size, and capacity of the storage devices installed in the computer, run Computer Setup. Refer to the Computer Setup (F10) Utility Guide for more information. 6.8.4 Removing an Optical Drive or Diskette Drive - SFF chassis Ä CAUTION: All removable media should be taken out of the drives before removing the drive from the computer. ✎ An optical drive is a CD-ROM, CD-RW, or DVD-ROM drive. 1. Turn off the computer properly through the operating system, then turn off any external devices. 2. Disconnect the power cord from the power outlet and disconnect any external devices. 3. Remove the computer access panel and front bezel. 4. Raise the Easy Access drive bay to the upright position. 5. Disconnect the audio, signal, and drive power cables. The other end of the audio cable should remain connected to the audio connector on the system board. ✎ Only Linux systems will have an audio cable connected to the optical drive. 6. Return the Easy Access drive bay to the up position. 6-20 431672-001 Service Reference Guide
-
 1
1 -
2
-
3
-
4
-
5
-
6
-
7
-
8
-
9
-
10
-
11
-
12
-
13
-
14
-
15
-
16
-
17
-
18
-
19
-
20
-
21
-
22
-
23
-
24
-
25
-
26
-
27
-
28
-
29
-
30
-
31
-
32
-
33
-
34
-
35
-
36
-
37
-
38
-
39
-
40
-
41
-
42
-
43
-
44
-
45
-
46
-
47
-
48
-
49
-
50
-
51
-
 52
52 -
 53
53 -
 54
54 -
 55
55 -
 56
56 -
 57
57 -
 58
58 -
 59
59 -
 60
60 -
 61
61 -
 62
62 -
63
-
64
-
65
-
66
-
67
-
68
-
69
-
70
-
71
-
72
-
73
-
74
-
75
-
76
-
77
-
78
-
79
-
80
-
81
-
82
-
83
-
84
-
85
-
86
-
87
-
88
-
89
-
90
-
91
-
92
-
93
-
94
-
95
-
96
-
97
-
98
-
99
-
100
-
101
-
102
-
103
-
104
-
105
-
106
-
107
 |
 |
