Honeywell VISTAKEY User Guide - Page 40
Performing Scheduling Operations cont'd
 |
View all Honeywell VISTAKEY manuals
Add to My Manuals
Save this manual to your list of manuals |
Page 40 highlights
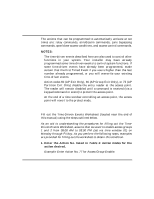
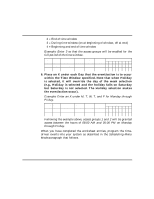
Performing Scheduling Operations (cont'd) Example: Enter 08:00 AM as the start time for time window 1. Time Window Number 1 2 Start Time (HH:MM) 08:00 AM Stop Time (HH:MM) 2. Enter the Stop Time desired for the time window. Note that if your system uses a 24-hour clock (i.e., 5:00 PM displays as 17:00) the time entered here must also be based on a 24-hour clock, so add 12 to any entries that are PM. Example: Enter 05:00 PM as the stop time for time window 1. Time Window Number 1 2 Start Time (HH:MM) 08:00 AM Stop Time (HH:MM) 05:00 PM 3. Repeat steps 1 and 2 for each time window desired. When the worksheet entries have been completed, the time windows may be programmed into the system as described in the Scheduling Menu Mode paragraph later in this section. The Time-Driven Events Worksheet (if desired) may be completed before programming the time windows into the system. Time-Driven Events Time-Driven Events are used to make something occur (action) based on time. Note that Time-Driven Events are optional and are not required to operate the system. They are only used to have time cause an action. These are the schedules used to activate outputs, bypass zones, etc. based on a time schedule. There are 20 events that may be programmed for the system, with each event governed by a previously defined time window. - 40 -
-
 1
1 -
2
-
3
-
4
-
5
-
6
-
7
-
8
-
9
-
10
-
11
-
12
-
13
-
14
-
15
-
16
-
17
-
18
-
19
-
20
-
21
-
22
-
23
-
24
-
25
-
26
-
27
-
28
-
29
-
30
-
31
-
32
-
33
-
34
-
 35
35 -
 36
36 -
 37
37 -
 38
38 -
 39
39 -
 40
40 -
 41
41 -
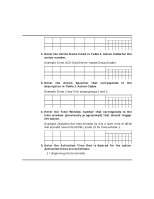 42
42 -
 43
43 -
 44
44 -
 45
45 -
46
-
47
-
48
-
49
-
50
-
51
-
52
-
53
-
54
-
55
-
56
-
57
-
58
-
59
-
60
 |
 |
