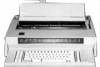
IBM 6 Operation Guide - Page 21
Continuous, Underline, Centering
 |
UPC - 587547601018
View all IBM 6 manuals
Add to My Manuals
Save this manual to your list of manuals |
Page 21 highlights
Continuous Underline Turning Continuous Underline On Hold down Code while you press U (ea aa). • The printwheel spins. • Everything you type will be underlined until you turn Continuous Underline off. Note: If the printwheel does not spin, make sure Multiple Underline is turned off. Turning Continuous Underline Off Hold down Code while you press U. • The printwheel spins. • The typewriter stops underlining. Helpful Hints • It you are within the correction memory, the characters and underlines are automatically erased when you press the Correction key. • To manually erase underlined characters, turn Underline on and then erase the incorrect characters. • Spaces created by a tab are not underlined. • if you want to add underlined text or turn Underline an under text you have already typed, you must: - Play up to the point where you want to start underlining or add text. - Turn Underline on. - Play through the text you want underlined or type the new text. - Turn Underline off. Centering Ypu can automatically center words between the left and right margins or at any point on the page. Centering Between the Left and Right Margins 1.' Press CRtn. • The carrier must be positioned at the left margin. 2. Hold down £ode while you press C (Ctr). • The pritilwheel spins. • The carrier moves to the center point between the margint 3. Type the wards you want centered. • As you type, the carrier backs up without printing. • If you make an error, press the Correction key and type tilt correct character. 4. Hold down Code while you press C. • The words print. Note: The Centered words also print when you press Tab, Dec or CRtn. Centering at Any point on the Page 1. Press Tab or Spacebar to position the carrier at the desired center point: 2. I Hold down Code while you press C. • The printwheel spins. 3. Type the words you want centered. • As you type, the carrier backs up without printing. 4. i Hold down Code while you press C. • The words print. Note: The centered words also print when you press Tab, D•c1 !or CAM. 24 Operator's Guide Advanced Operations,
-
 1
1 -
2
-
3
-
4
-
5
-
6
-
7
-
8
-
9
-
10
-
11
-
12
-
13
-
14
-
15
-
 16
16 -
 17
17 -
 18
18 -
 19
19 -
 20
20 -
 21
21 -
 22
22 -
 23
23 -
 24
24 -
 25
25 -
 26
26 -
27
-
28
-
29
-
30
-
31
-
32
-
33
-
34
-
35
-
36
-
37
-
38
-
39
-
40
-
41
-
42
-
43
-
44
-
45
-
46
-
47
-
48
-
49
-
50
-
51
-
52
-
53
-
54
-
55
-
56
-
57
-
58
-
59
-
60
-
61
-
62
-
63
-
64
-
65
-
66
-
67
-
68
-
69
-
70
-
71
-
72
-
73
-
74
-
75
-
76
-
77
-
78
-
79
-
80
-
81
-
82
-
83
-
84
-
85
-
86
-
87
-
88
-
89
-
90
-
91
-
92
-
93
-
94
 |
 |
