IBM 6 Operation Guide - Page 86
Ribbon, Cassette, System
 |
UPC - 587547601018
View all IBM 6 manuals
Add to My Manuals
Save this manual to your list of manuals |
Page 86 highlights
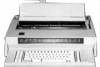
Ribbon Cassette System Ribbon Cassette Tape Cassette Color-Coded Take-Up Wheel Color-Coded Take-Up Wheel The ribbon and tape cassettes fasten together. Each type of ribbon at(hSneedewta"hpReeieblcbcaoosnlsoCertatheseshlpeaststeyaoRcueoomloradr-teccrohNdtheuedrntrbaibekbreso-"unpotnowpthhaeegeeclo7irn+re1mc1.to)iosTnthcteaapsceeos.lor also tells you which type of ribbon you are using. Removing the Cassettes 1. Space or tab to the center of your typewriter. 2. Raise the typewriter cover. 3. Make sure the paper bail is against the platen. 4. Push the release lever until the cassettes release. 5. Litt the cassettes Up and out of the typewriter. Paper Bail Release Lever installing the Cassettes ' After you remove the cassettes from your typewriter, press on the top of the center latch, slide the cassettes apart and throw away the used cassette. 2. Slide the ribbon cassette onto the tape cassette. • Be sure the center latch latches onto the correction tape. 3, Press the gray tabs (on both ends of the correction tape) to be sure the tape and ribbon cassettes are latched together. 4. Before installing the ribbon in the typewriter, tighten any slack in the ribbon by turning the take-up wheels to move the color-coded leaders past the center. Install the cassettes in your typewriter. 6. Push down on the upper right corner of the ribbon cassette to snap it €nto place. Center Latch dJ 14•• 4.• -71 Take-Up Wheals 3 Obetrator1 Guide Reference 1-
-
 1
1 -
2
-
3
-
4
-
5
-
6
-
7
-
8
-
9
-
10
-
11
-
12
-
13
-
14
-
15
-
16
-
17
-
18
-
19
-
20
-
21
-
22
-
23
-
24
-
25
-
26
-
27
-
28
-
29
-
30
-
31
-
32
-
33
-
34
-
35
-
36
-
37
-
38
-
39
-
40
-
41
-
42
-
43
-
44
-
45
-
46
-
47
-
48
-
49
-
50
-
51
-
52
-
53
-
54
-
55
-
56
-
57
-
58
-
59
-
60
-
61
-
62
-
63
-
64
-
65
-
66
-
67
-
68
-
69
-
70
-
71
-
72
-
73
-
74
-
75
-
76
-
77
-
78
-
79
-
80
-
 81
81 -
 82
82 -
 83
83 -
 84
84 -
 85
85 -
 86
86 -
 87
87 -
 88
88 -
 89
89 -
 90
90 -
 91
91 -
92
-
93
-
94
 |
 |
