IBM 6 Operation Guide - Page 7
it If
 |
UPC - 587547601018
View all IBM 6 manuals
Add to My Manuals
Save this manual to your list of manuals |
Page 7 highlights
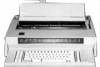
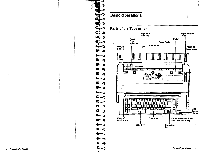
Keyboard Height Adjust Levers Ill 11 Keyboard Height Adi st Lovers ED i ii J The keyboard can be raised or lowered to the most comfortable position by using the keyboard height adjust levers. There are three positions: low, medium, and high. 1. Use the Spacebar to move the carrier to the center of your type- writer. 2. Turn the typewriter off. 3. Raise the top cover, 4. Locate the two blue keyboard height adjust levers. They are located on the Inside of the typewriter on the right and lett sides of the bottom panel. 5. Push down on the levers and slide them to the desired position until they lock into place. • When the levers are all the way forward, the keyboard is in the high position. • When the levers are In the middle, the keyboard is in the • medium position. When the levers are all the way back, the keyboard Is in the low position. 6. Make sure that you have both levers locked Into the same posi- tion. 1-2 Operator's Guide Page End Indicator and Scale 0-Bottom of Paper -V from Bottom - r from Bottom Page End Indicator it If Pace End Scale n. I I IT] 1. IFIalse the page and indicator until it is straight up. 2. ,Pull • the page end scale As you type, the top all of the the way out until paper comes it locks Into place. out of the typewrite ' and moves up to the lines on the scale. sTphaecleinreesmoanintshetoscthaelebtoetltloymouofap2p7r.9oxcimma(1te1lyinh)opwapmeur.ch • The left side of the scale is marked in inches. The right side is marked in centimeters. Basic Operations 1-
-
 1
1 -
 2
2 -
 3
3 -
 4
4 -
 5
5 -
 6
6 -
 7
7 -
 8
8 -
 9
9 -
 10
10 -
 11
11 -
 12
12 -
13
-
14
-
15
-
16
-
17
-
18
-
19
-
20
-
21
-
22
-
23
-
24
-
25
-
26
-
27
-
28
-
29
-
30
-
31
-
32
-
33
-
34
-
35
-
36
-
37
-
38
-
39
-
40
-
41
-
42
-
43
-
44
-
45
-
46
-
47
-
48
-
49
-
50
-
51
-
52
-
53
-
54
-
55
-
56
-
57
-
58
-
59
-
60
-
61
-
62
-
63
-
64
-
65
-
66
-
67
-
68
-
69
-
70
-
71
-
72
-
73
-
74
-
75
-
76
-
77
-
78
-
79
-
80
-
81
-
82
-
83
-
84
-
85
-
86
-
87
-
88
-
89
-
90
-
91
-
92
-
93
-
94
 |
 |
