Intermec PB31 PB21 and PB31 Mobile Receipt Printer User Guide - Page 45
Setting Up 802.11 Radio Communications, Printer Tasks, Wireless Setup Wizard
 |
View all Intermec PB31 manuals
Add to My Manuals
Save this manual to your list of manuals |
Page 45 highlights
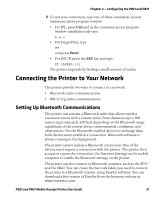
Chapter 2 - Configuring the PB21 and PB31 Setting Up 802.11 Radio Communications The printer can have an internal 802.11 b/g radio to transfer and receive data using wireless communications. This manual assumes that you have already set up your wireless communications network including your access points. These procedures include information on setting up wireless security for both IPL and Fingerprint versions of the printer. The printer supports these authentication modes: none, WEP, WPA Personal and Enterprise mode (802.1x authentication), WPA2 Personal and Enterprise mode (802.1x authentication). Note: WPA and WPA2 Enterprise modes currently support PEAP, TTLS, and LEAP. For LEAP authentication, the printer supports Open EAP, but does not support Network EAP. To set up the printer to work in your wireless network, you need: • serial cable (P/N 075497-xxx). • a host PC running Windows or Linux. • a communications application, such as HyperTerminal. Note: If you are using IPL commands with HyperTerminal, you may want to be able to see the commands as you type them on your screen. For help, see "Changing Configuration Settings Using the Command Line" on page 42. To set up the printer for wireless communications using PrintSet 1 Connect the 8-pin circular DIN connector to the serial port on the printer. Connect the other end of the serial cable to a serial port on your PC. 2 On your PC, start PrintSet. 3 Select your printer from the My Printers list. For more information on how to add a printer to PrintSet, see "To connect the printer to a PC through the serial port using PrintSet" on page 29. 4 In the Printer Tasks list, click Wireless Setup Wizard. If you are prompted for the administrator user name and password, type them and click Next. PB21 and PB31 Mobile Receipt Printer User Guide 33
-
 1
1 -
2
-
3
-
4
-
5
-
6
-
7
-
8
-
9
-
10
-
11
-
12
-
13
-
14
-
15
-
16
-
17
-
18
-
19
-
20
-
21
-
22
-
23
-
24
-
25
-
26
-
27
-
28
-
29
-
30
-
31
-
32
-
33
-
34
-
35
-
36
-
37
-
38
-
39
-
 40
40 -
 41
41 -
 42
42 -
 43
43 -
 44
44 -
 45
45 -
 46
46 -
 47
47 -
 48
48 -
 49
49 -
 50
50 -
51
-
52
-
53
-
54
-
55
-
56
-
57
-
58
-
59
-
60
-
61
-
62
-
63
-
64
-
65
-
66
-
67
-
68
-
69
-
70
-
71
-
72
-
73
-
74
-
75
-
76
-
77
-
78
-
79
-
80
-
81
-
82
-
83
-
84
-
85
-
86
-
87
-
88
-
89
-
90
-
91
-
92
-
93
-
94
-
95
-
96
-
97
-
98
-
99
-
100
 |
 |
