Intermec PB32 PB22 and PB32 Mobile Label and Receipt Printer User Guide - Page 43
Connecting the Printer Through the Serial Port, Continue, Anyway, Finish, File > Add printer
 |
View all Intermec PB32 manuals
Add to My Manuals
Save this manual to your list of manuals |
Page 43 highlights
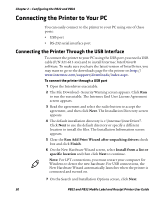
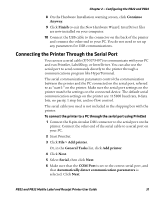
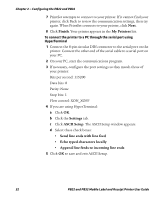
Chapter 2 - Configuring the PB22 and PB32 8 On the Hardware Installation warning screen, click Continue Anyway. 9 Click Finish to exit the New Hardware Wizard. InterDriver files are now installed on your computer. 10 Connect the USB cable to the connector on the back of the printer and connect the other end to your PC. You do not need to set up any parameters for USB communications. Connecting the Printer Through the Serial Port You can use a serial cable (P/N 075497) to communicate with your PC and run PrintSet, LabelShop, or InterDriver. You can also use the serial port to send commands directly to the printer through a communications program like HyperTerminal. The serial communication parameters control the communication between the printer and the PC connected on the serial port, referred to as "uart1:" on the printer. Make sure the serial port settings on the printer match the settings on the connected device. The default serial communication settings on the printer are: 115200 baud rate, 8 data bits, no parity, 1 stop bit, and no flow control. The serial cable you need is not included in the shipping box with the printer. To connect the printer to a PC through the serial port using PrintSet 1 Connect the 8-pin circular DIN connector to the serial port on the printer. Connect the other end of the serial cable to a serial port on your PC. 2 Start PrintSet. 3 Click File > Add printer. Or, in the General Tasks list, click Add printer. 4 Click Next. 5 Select Serial, then click Next. 6 Make sure that the COM Port is set to the correct serial port, and that Automatically detect communication parameters is selected. Click Next. PB22 and PB32 Mobile Label and Receipt Printer User Guide 31
-
 1
1 -
2
-
3
-
4
-
5
-
6
-
7
-
8
-
9
-
10
-
11
-
12
-
13
-
14
-
15
-
16
-
17
-
18
-
19
-
20
-
21
-
22
-
23
-
24
-
25
-
26
-
27
-
28
-
29
-
30
-
31
-
32
-
33
-
34
-
35
-
36
-
37
-
 38
38 -
 39
39 -
 40
40 -
 41
41 -
 42
42 -
 43
43 -
 44
44 -
 45
45 -
 46
46 -
 47
47 -
 48
48 -
49
-
50
-
51
-
52
-
53
-
54
-
55
-
56
-
57
-
58
-
59
-
60
-
61
-
62
-
63
-
64
-
65
-
66
-
67
-
68
-
69
-
70
-
71
-
72
-
73
-
74
-
75
-
76
-
77
-
78
-
79
-
80
-
81
-
82
-
83
-
84
-
85
-
86
-
87
-
88
-
89
-
90
-
91
-
92
-
93
-
94
-
95
-
96
-
97
-
98
-
99
-
100
-
101
-
102
-
103
-
104
 |
 |
