Kenmore 5478 Use and Care Guide - Page 15
Cleaning the Storage Bin
 |
UPC - 883049131900
View all Kenmore 5478 manuals
Add to My Manuals
Save this manual to your list of manuals |
Page 15 highlights
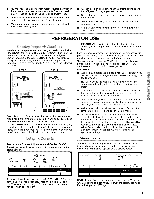
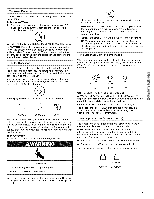
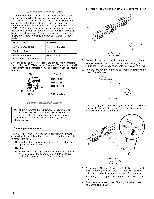
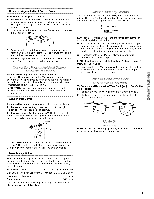
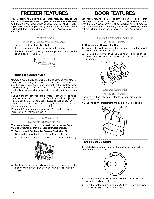
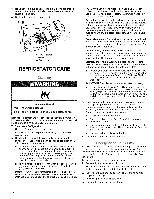
Flushing the Water System After Changing Filter After connecting the refrigerator to a water source, flush the water system. Use a sturdy container to depress and hold the water dispenser lever for 5 seconds, then release it for 5 seconds. Repeat until water begins to flow. Once water begins to flow, continue depressing and releasing the dispenser lever (5 seconds on, 5 seconds off) for an additional 5 minutes. This will flush air from the filter and water dispensing system. Additional flushing may be required in some households. NOTE: As air is cleared from the system, water may spurt out of the dispenser. Using the Dispenser Without the Water Filter Cartridge You can run the dispenser without a water filter cartridge. Your water will not be filtered. 1. Remove the filter by pressing the eject button and pulling on the cap. See "Changing the Water Filter" earlier in this section. 2. Remove the cap by turning it counterclockwise until it stops. IMPORTANT: Do not discard the cap. It is part of your refrigerator. Keep the cap to use with the replacement filter. 3. With the cap in a horizontal position, insert the cap into the base grille until it stops. Removing and Replacing the Storage Bin 1. Hold the base of the storage bin with both hands and press the release button to lift the storage bin up and out. NOTE: It is not necessary to turn the ice maker control to the OFF (right) position when removing the storage bin. The sensor cover ("flipper door") on the left wall of the freezer stops the ice maker from producing ice if the door is open or the storage bin is removed. 2. Replace the storage bin on the door and push down to make sure it is securely in place. Cleaning the Storage Bin 4= Turn the cap counterclockwise until the cap slips into the attachment slot. Then, turn the cap clockwise until it is in a horizontal position. NOTE: The cap will not be even with the base grille. Turning the Ice Maker On/Off The On/Off switch is located on the top right side of the freezer compartment. 1. Slide the control to the ON (left) position. NOTE: Your ice maker has an automatic shutoff. The ice maker sensor passes a beam from one freezer wall to the other, automatically stopping ice production when the storage bin is full. The control will remain in the ON (left) position. 2. To manually turn the ice maker off, slide the control to the OFF (right) position. Cut Hazard Plastic impeller blades cover a sharp ice shaving blade. Keep fingers away from ice shaving blade. Failure to do so can result in cuts. For best performance, clean the storage bin on a regular basis, especially after periods of little or no use. NOTE: There are two dispensing mechanisms in the bottom of the ice storage bin. In the door handle-side of the bin is an auger (metal spiral) that is part of the mechanism that converts ice cubes to crushed ice. In the hinge-side of the bin is a plastic impeller that is part of the mechanism that converts ice cubes to shaved ice. 1. Empty the ice container. Use warm water to melt the ice if necessary. NOTE: Do not use anything sharp to break up the ice in the bin. This can damage the ice bin and the dispensing mechanisms. 2. Wash ice bin with a mild detergent, rinse well and dry thoroughly. Do not use harsh or abrasive cleaners or solvents. Remember • Allow 24 hours to produce the first batch of ice. Allow 3 days to completely fill ice container. • Discard the first three batches of ice produced to avoid impurities that may be flushed out of the system. • The quality of your ice will be only as good as the quality of the water supplied to your ice maker. 15
-
 1
1 -
2
-
3
-
4
-
5
-
6
-
7
-
8
-
9
-
 10
10 -
 11
11 -
 12
12 -
 13
13 -
 14
14 -
 15
15 -
 16
16 -
 17
17 -
 18
18 -
 19
19 -
 20
20 -
21
-
22
-
23
-
24
-
25
-
26
-
27
-
28
-
29
-
30
-
31
-
32
-
33
-
34
-
35
-
36
-
37
-
38
-
39
-
40
-
41
-
42
-
43
-
44
-
45
-
46
-
47
-
48
-
49
-
50
-
51
-
52
-
53
-
54
-
55
-
56
-
57
-
58
-
59
-
60
-
61
-
62
-
63
-
64
-
65
-
66
-
67
-
68
-
69
-
70
-
71
-
72
-
73
-
74
-
75
-
76
-
77
-
78
-
79
-
80
-
81
-
82
-
83
-
84
 |
 |
