Kenmore 8472 Use and Care Guide - Page 11
Kenmore 8472 - 3.4 cu. Ft. Compact Portable Electric Dryer Manual
 |
View all Kenmore 8472 manuals
Add to My Manuals
Save this manual to your list of manuals |
Page 11 highlights
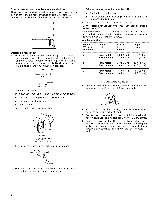
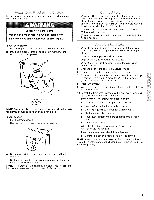
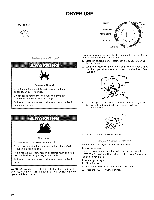
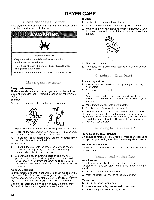
Load clothes loosely into the dryer. Do not pack the dryer. Allow space for clothes to tumble freely. The following chart shows the maximum load you can place in your compact dryer. Expect longer drying times. Heavy work clothes Delicates 2 pair of pants, 3 work shirts LESS DRY TIMED DRY 75 NORMALDRY AUTO DRY || 1 camisole, 2 slips, 4 undergarments, 1 set of sleepwear, 1 half slip 9 bath towels; or 6 bath towels, 3 hand towels, 6 washcloths Cycle Control knob 15 30 Towels Mixed Load 2 pillowcases, slacks 1 T-shirt, 2 shirts, 1 pair Knits Perm. Press 2 slacks, 2 shirts; or 3 dresses 6 shirts; or 2 double sheets & 2 pillowcases; or 2 single sheets & 2 pillowcases Auto Dry II Use this cycle to dry most loads. Dryness is determined by thermostats that react to the amount of moisture in the air exhausted from the dryer. Moist air indicates clothes are damp. Dry air indicates that moisture has been removed. This cycle includes a 10 minute (approximately) cool down period at the end of the cycle to make clothes easier to handle and reduce wrinkling. Dry most loads using the Normal Dry (,) setting. When the cycle ends, check the dryness of the load. Select the correct cycle for your load. Your dryer tumbles the load without heat during the last few minutes of all cycles to make the load easier to handle. Drying tips • Follow care label directions when they are available. • • If desired, add a fabric softener sheet. Follow package instructions. Remove the load from the dryer as soon as tumbling stops to reduce wrinkling. This is especially important for permanent press, knits, and synthetic fabrics. • • If the load is drier than you like, select a setting closer to LESS DRY the next time you dry a similar load. If the load is not as dry as you like, complete drying using the Timed Dry cycle. The next time you dry a similar load, select a setting closer to MORE DRY. NOTE: Drying time with an automatic cycle varies according to the type of fabric, size of load, and temperature setting. See "Drying, Cycle and Temperature Tips." Timed Dry Use this cycle to complete drying if items are still damp after the Auto Dry II cycle. Timed Dry is also useful for heavyweight and bulky items, such as bedspreads, work clothes, and large loads that require a long drying time. Use this cycle to get up to 105 minutes of heated drying time. The heating cycle is followed by a 10 minute (approximately) cool down period. Air Dry Use the Air Dry cycle for items that require drying without heat such as rubber, plastic and heat-sensitive fabrics. This chart shows examples of items that can be dried using an air cycle. Type of Load Foam rubber--pillows, Plastic--shower Rubber-backed padded bras, stuffed toys Minutes* 20 - 30 20 - 30 40 - 50 sheer nylon 10 - 20 Cycle and temperature tips • Dry most loads using the Normal Dry setting Use a no heat (air) setting for rubber, plastic, or heat-sensitive fabrics. Line dry bonded or laminated fabrics. NOTE: If you have questions about drying temperatures for various loads, refer to the care label directions. curtains, tablecloths rugs Olefin, polypropylene, *Reset time as needed to allow items to dry completely. When using Air Dry Check to see that coverings are securely stitched. Shake and fluff pillows by hand periodically during the cycle. Dry item completely. Foam rubber pillows are slow to dry. End of Cycle Signal Your dryer sounds a signal when a drying cycle is finished.This signal is helpful when you are drying items that need to be removed as soon as the dryer stops in order to prevent wrinkles. 11
-
 1
1 -
2
-
3
-
4
-
5
-
 6
6 -
 7
7 -
 8
8 -
 9
9 -
 10
10 -
 11
11 -
 12
12 -
 13
13 -
 14
14 -
 15
15 -
 16
16 -
17
-
18
-
19
-
20
-
21
-
22
-
23
-
24
-
25
-
26
-
27
-
28
-
29
-
30
-
31
-
32
-
33
-
34
-
35
-
36
-
37
-
38
-
39
-
40
 |
 |